
Do’s and Don’ts of Candle Making: Tips and Tricks For Success
Gain candle making tips and tricks, because nothing beats the glow of a homemade candle! Avoid common mistakes with candle making do’s and don’ts, calculators, and printable charts you can keep.
Nothing beats the golden glow of candlelight. Except… maybe the pour.
DIY enthusiasts can’t help but dip their toes into the art of the pour. But let’s be honest: while melting and pouring wax sounds like a relaxing, carefree weekend project, candle making is actually a precise science.
Yep, this cozy home essential doesn’t come easily.
Without a few insider tricks of the trade, projects can quickly turn into a frustrating cycle of tunneling wax, a weak scent throw, or mushroomed wicks. Mastering the basics doesn’t just save your craft budget—it guarantees a beautiful, high-quality burn every single time.
In this beginner’s guide, I’ll light the way through the critical do’s and don’ts of homemade candle making.
From choosing the safest vessels to nailing your fragrance math, these actionable tips will ensure your candle-making experience is entirely safe, stress-free, and notably rewarding.
This post contains some affiliate links. Thank you for your support. Please read the full disclosure policy for more details.
Essential Candle Making Tips and Tricks
Who isn’t smitten with the idea of pouring your own candles? Well, like any craft, there are tricks of the trade to master.
Whether you’re a complete novice to homemade candles or have made several, this guide is a great way to quickly gain insight for better candles. I’ll uncover the essential do’s and don’ts of candle making so you can achieve professional results with every pour.
Don’t Use A Bad Container
Don’t pour your wax into a container that will leak, crack, or melt. Avoid thin glass, plastics, and unsealed porous materials.
Do Use A Safe Container
Choose heavy-duty, heat-resistant vessels. Always test repurposed containers for leaks by filling them with water before pouring your wax.
Safe Options for Candle Making:
- Glazed Ceramics & Ramekins: Use pieces marked microwave or dishwasher-safe. Check vintage items carefully for micro-cracks.
- Metal Candle Tins: Seamless, leak-proof, and perfect for beginners because metal tins hide visual wax imperfections.
- Thick Glass Jars: Opt for heat-resistant glass like traditional Mason jars or amber glass containers.
- Enamel Mugs & Bowls: Built to withstand intense thermal stress, these vessels are heavy-duty and crack-resistant.
Learn more about choosing a container for your next candle project.
Don’t Use The Wrong Wick
An incorrect wick size can ruin an otherwise perfect candle.
- If it’s too thin, your candle will tunnel, fail to throw scent, or self-extinguish.
- If it’s too thick, the flame will flicker excessively, throw soot, mushroom, or create a deep melt pool that burns through your wax far too quickly.
Do Measure and Plan Ahead
Finding the perfect wick requires balancing a few core factors to get a clean, even burn every time.
Before Choosing a Wick Follow These Tips:
Tips
- Measure Container Diameters: The wider the container, the thicker the wick you’ll need. Wide vessels over 3–4 inches may even require multiple wicks.
- Select Your Wax Type: Soy, beeswax, and coconut wax all have different densities and melting points. Make sure you select compatible wick styles (like ECO, LX, or hemp braided wicks).
- Plan For Fragrance & Color Load: Heavy amounts of fragrance oils or candle dyes can weigh down the wax, meaning you may need to size up your wick to keep it lit.
- Choose Your Wick Material: Pre-waxed cotton or hemp wicks ensure an easy pour and optimal scent throw, while wood wicks add a unique aesthetic and a cozy crackling sound.
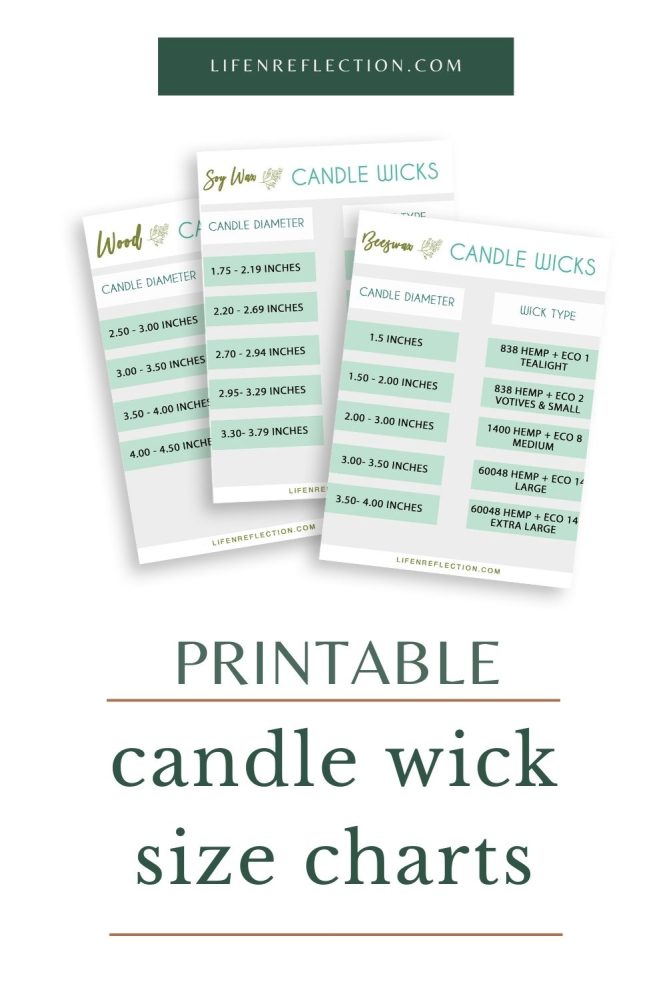
Use a wick size chart to quickly select the right wick for each candle project you create!
Grab my free
Candle Maker Guides
Join thousands of members and gain access to all past, current, and future items in the Library along with our exclusive Simple Living Weekly Edition.
Don’t Pour Short
Not having enough wax is a common candle problem!
Don’t make my mistake and assume a jar that holds 8 ounces of water will hold 8 ounces of wax. Because wax is less dense than water, measuring by liquid volume rather than weight will consistently leave you short on wax.
Do Use A Candle Wax Calculator
To ensure you have the perfect amount for every pour, always measure your wax by weight using a digital scale rather than a measuring cup.
How to Calculate the Perfect Amount
- Determine Fill: Fill your empty candle jar with water up to the intended fill line, then record the fluid ounce capacity.
- Calculate: Skip the manual math and use a candle calculator to plug in your jar size and number of candles to get the exact weight instantly.
- Account for Scent: Don’t forget to subtract the weight of your fragrance oil from your total wax weight so you don’t overflow the container.
Don’t Overheat
Don’t guess your wax temperature or pour blindly.
You see, overheating your wax, adding your fragrance oil at the wrong temperature, or pouring too hot can ruin your candle before it even cures.
You’ll burn off expensive fragrance (destroying your hot throw), create sinkholes around the wick, and cause ugly cosmetic flaws like cracking or frosting as the wax shrinks too quickly.
Do Use A Thermometer
Avoid these downfalls by using a laser thermometer to track every phase of the melting process. Making candles is a precise science, and monitoring the exact temperature ensures your fragrance properly binds with the wax and cools uniformly.
To Manage Your Candle Temperatures:
- Monitor the Melt: Heat your wax flakes until they are fully melted, keeping a close eye on the recommended melting point for your specific wax type.
- Add Fragrance Right: Let the wax cool to the optimal blending temperature recommended by your manufacturer before stirring in your scent, ensuring it bonds without burning off.
- Stir Slowly: Stir your fragrance for a full two minutes, but do it gently to avoid whipping air bubbles into the hot wax.
- Pour at the Sweet Spot: Let the wax cool to its specific pouring temperature. Warming up your candle jars with a heat gun before pouring will also prevent cosmetic cracking and wet spots.
Don’t Add Too Much Fragrance
It is incredibly tempting to pour EXTRA fragrance into the melting pot to get a stronger aroma. But, trust me on this – it’s an expensive mistake!
I found out the hard truth years ago, overloading my wax causing excess oil to “sweat” out in greasy pools on top. Worse yet, it completely overwhelmed the wick—causing heavy mushrooming, drowning the wick and failing to stay lit.
Do Use A Fragrance Calculator
Use a quick fragrance calculator to strike the perfect balance for your wax type. I created this custom tool to completely eliminate the messy math and guesswork from candle making, helping you mix a clean-burning candle that throws an incredible scent without overloading the vessel.
Tips for Mastering Your Candle Fragrance Load:
Tips
- Know Your Max: Always check your wax manufacturer’s guidelines to find its maximum fragrance load capacity—most natural soy waxes cap out between 10% and 12%.
- Find the Sweet Spot: High-quality handcrafted candles typically sit comfortably between a 6% and 10% fragrance load for a powerful, soot-free throw.
- Stir with Intent: After adding your oil at the correct temperature, stir the wax continuously and gently for a full two minutes so the fragrance completely binds.
- Cure for Strength: Be patient! Let your scented candles cure for at least three days (and ideally 1 to 2 weeks) for the strongest possible hot throw.
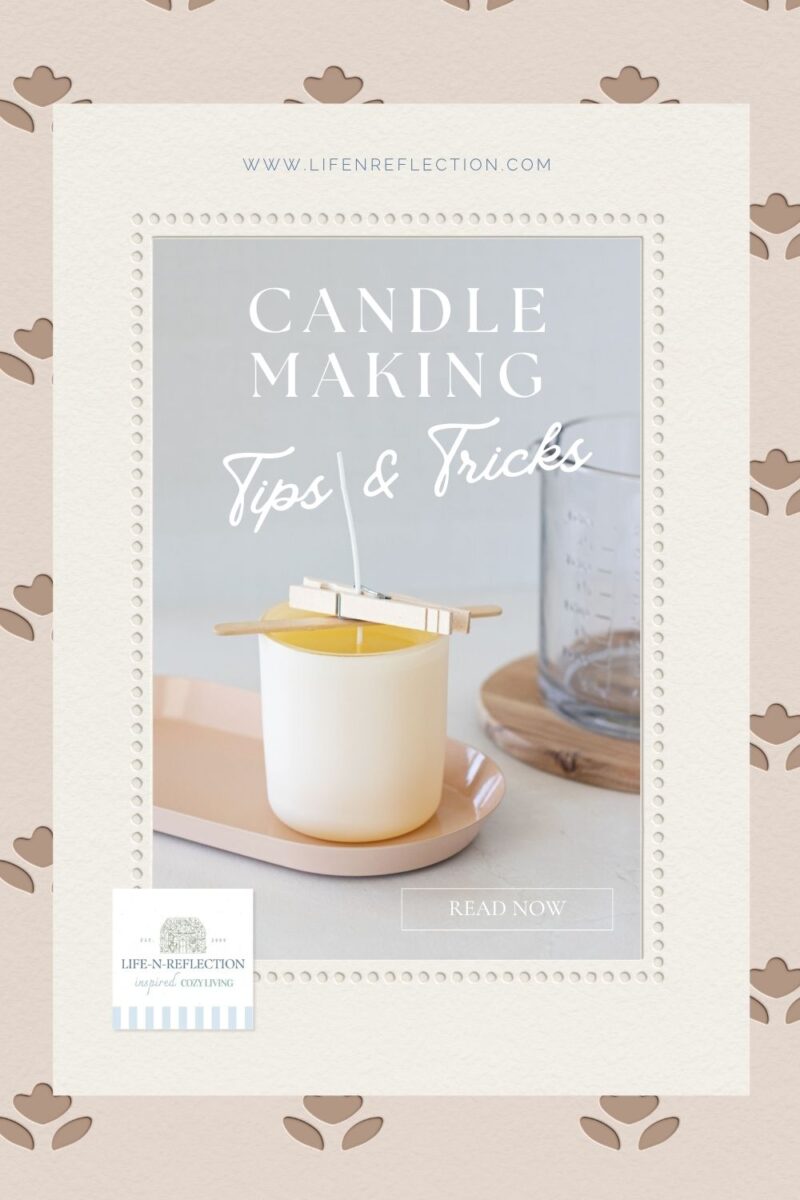
Don’t Leave Your Wick Unsupported
Don’t let your wick float freely or sit off-center. Leaving a wick unsupported while pouring or curing causes it to tilt, shift, or bend as the hot wax moves.
And an off-center wick leads to severe candle tunneling, an uneven melt pool, excess soot, and dangerous overheating on one side of your container.
Do Use Wick Tools
You can skip all of those candle problems, by using simple, inexpensive tools to lock your wick dead-center and keep it perfectly upright from the moment you pour the hot wax to the final set.
Essential Wick Setting Steps:
- Secure the Base: Apply a double-sided wick sticker or high-bond glue dot directly to the bottom of your metal wick tab (or wood wick clip).
- Press Firmly: Press the wick base firmly into the absolute center of your clean container to establish a strong, heat-resistant seal.
- Lock it Upright: Slip a metal or wooden wick-centering device over the top of your jar to pull the wick taut and anchor it in place.
- Leave Until Set: Keep the centering device attached until the candle has completely cooled and solidified to guarantee a flawless, safe burn.
Save this candle guide to your DIY Candle Ideas Pinterest board!
Find this helpful?
Share it on Pinterest
And while you’re there, be sure to follow Life-n-Reflection for more inspiring ideas.
Master Your Next Candle Creation
You now have the tools, the tips, and the confidence to move past the guesswork with these essential candle making tips.
Remember, every candle you pour is an opportunity to learn and refine your craft. So, grab your wax, prep your containers, and enjoy the creative process. You’ve totally got this!