I don’t miss decorating a real Christmas Tree
For the majority of our marriage, nine years to be exact we brought home a real Christmas tree.
I always dreamed of watching my husband chop down an evergreen tree from a little country Christmas tree farm. With snowflakes falling, we’d drive home with the tree in the back. Then, I’d make snicker-doodles and hot cocoa while he brought the tree in and set it up by the fireplace.
But for all those nine years we always found ourselves short on time and went to a big box home improvement store to buy a pre-cut tree trucked in from Wisconsin or Colorado.
It was always a guess as it if would make through the front door and fit by the fireplace. Especially, since the store would have tied up to keep the branches from breaking.
So, you never knew just how wide it would be until we got home my husband snipped all the ties. Sometimes he would have to cut off a branch or two and even trim the top to make it fit. By the time this was done, he wasn’t in the mood for snicker-doodles. Needless to say, I would spend hours carefully decorating the tree trying to dodge the prickly needles and sticky sap.
The Challenge of Keeping it Alive
For the first few years, I would water the Christmas tree every other day. Then when we adopted a puppy, she decided that water was hers too!
I would find myself adding water twice a day. This was not an easy task, trying not to spill water on the presents or overfill the bowl and ruin the floor every time.
In the weeks close to Christmas I would hear crashes of ornaments in the night or come from work to find several on the floor. This was caused by the weakening branches of a dying tree.
The Christmas Gift that Keeps on Giving
Once the big day came we would find pine needles in our presents. But, that was nothing to the ordeal of taking down the tree!
I had to wear my husband’s thick working gloves to get the ornaments off. The needles on the tree were so sharp they still poked me through the gloves.
And the lights, well the lights, I learned to just leave them on the tree and toss them out with it! Because there was no way I was getting those off without being pricked in a million places.
My unfortunate husband had the job of carrying it back out of our home and tossing it in the pond or the on the curb depending on where we lived. As he carried it out the tree would leave behind a trail of pine needles. They would find their way into everything for months to come. No matter how much I vacuumed, they became known as the Christmas gift that kept on giving.
This post contains some affiliate links for your convenience, read the full disclosure policy.

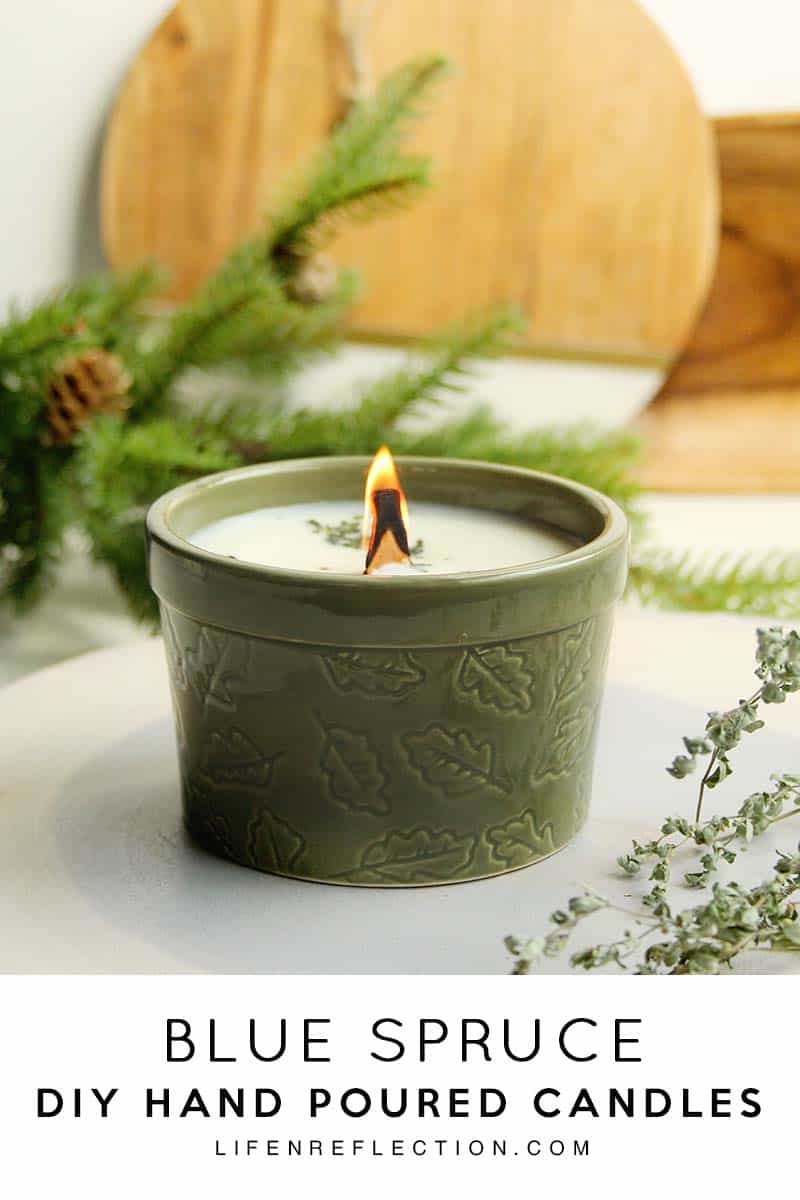
Bring the Outdoors in with Blue Spruce DIY Hand Poured Candles
So you may be wondering why we went to such trouble for so many years to have a real Christmas tree? Quite frankly, it was the fragrance. My husband and I love the scent of fresh evergreen and the tree always made Christmas somehow smell like Christmas to us.
So, what changed?
I figured out how to make candles and Winter Pine Room Spray with essential oils that smell just like the real thing!! And you know what my husband did? He bought us the biggest, tallest tree he could find – 9ft in all its glory with pre-lit lights that we didn’t have to buy again every year!
And now we enjoy the hassle-free Christmas tree and the fresh scent of evergreen!
Spread that wonderful evergreen scent throughout your home with this natural recipe for Blue Spruce Hand Poured Candles – chemical and pine needle-free too!
Related: Candle Making Supplies
Related: Surprisingly Easy DIY Candle Melts
Supplies to Make Blue Spruce DIY Hand Poured Candles:
2 lbs soy wax flakes
4 glue dots
4 candle pots, 8 ounce
1/2 to 1-ounce of spruce or blue spruce essential oil
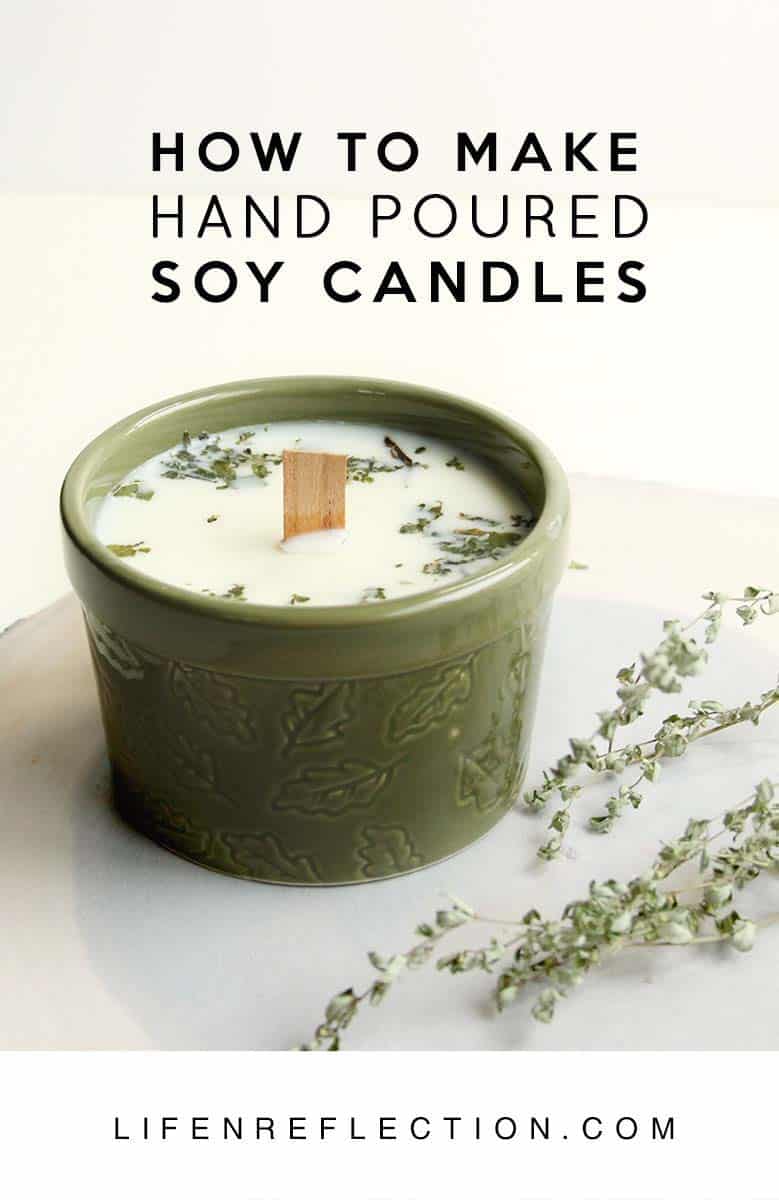
How to Make Blue Spruce DIY Hand Poured Candles:
Insert a wood wick into a metal clip. For a louder crackling sound, double up the wood wicks. The add a glue dot to the base of the metal clip. Place it in the center base of one glass jar. Repeat for all four until you have 4 containers with wicks inserted and set aside.
Next, fill a large saucepan with about 2 inches of water and place it on the stove to heat. Measure 2 pounds of soy wax flakes with a kitchen scale.
Pour measured wax into a candle pitcher and set it inside the large saucepan. Whisk often and heat until melted using the double broiler method.
Remove from heat immediately to avoid wax becoming too hot. Insert a candle thermometer and clip it to the inside of the pitcher. Let the wax cool to 120°F to 125°F before adding 1/2 to 1-ounce of essential oils.
Once the wax has cooled add fragrance and whisk or swirl to combine. Carefully pour the scented soy wax into prepared jars. Let cool 30 minutes to 1 hour or until the wax is hard and white. Then cut wicks to just meet the top of each jar.
After, allow these hand-poured candles to cure at least 3 days before burning. 1 to 2 weeks is even better for soy wax. The wait is so worth it as it will have a stronger scent throw the longer you wait!
Yields: 36 ounces or 4, 8-ounce candle pots
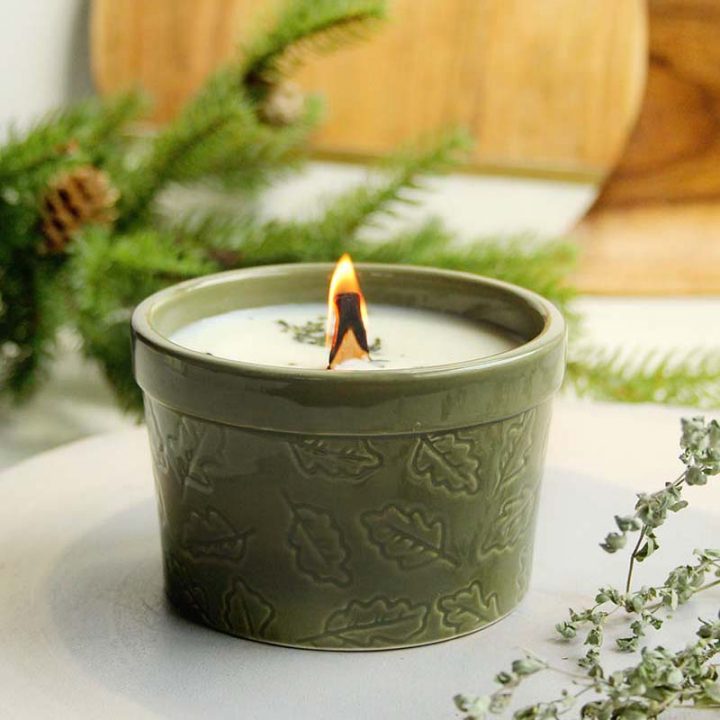
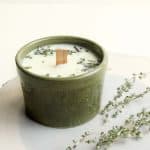
Blue Spruce Hand Poured Candle
Spread that wonderful evergreen scent throughout your home with this natural recipe for Blue Spruce Hand Poured Candles!
Materials
- 4 medium wood wicks and clips
- 2 lbs soy wax flakes
- 4 glue dots
- 4 candle pots, 8 ounce
- 1/2 ounce blue spruce essential oil
Tools
- candle melting pitcher
- candle thermometer
- digital kitchen scale
- metal whisk
Instructions
- Insert a wood wick into a metal clip. For a louder crackling sound, double up the wood wicks. The add a glue dot to the base of the metal clip. Place it in the center base of one glass jar. Repeat for all four until you have 4 containers with wicks inserted and set aside.
- Next, fill a large saucepan with about 2 inches of water and place it on the stove to heat. Measure 1 pound of soy wax flakes with a kitchen scale.
- Pour measured wax into a candle pitcher and set inside the large saucepan. Whisk often and heat until melted using the double broiler method.
- Remove from heat immediately to avoid wax becoming too hot. Insert a candle thermometer and clip it to the inside of the pitcher. Let the wax cool to 120°F to 125°F before adding a 1/2 ounce of essential oils.
- Once the wax has cooled add fragrance and whisk or swirl to combine. Carefully pour the scented soy wax into prepared jars. Let cool 30 minutes to 1 hour or until the wax is hard and white. Then cut wicks to just meet the top of each jar.
Notes
Bring the outdoors in with these blue spruce DIY hand-poured candles perfect for gifting.
Recommended Products
As an Amazon Associate and member of other affiliate programs, I earn from qualifying purchases.


Printable Reference Guide of Essential Oils for Winter
Use this easy, printable reference list of essential oils for Winter to help you create your own Signature Holiday Aromas. Grab this and many more candle making printables in the Simple Living Library.

And you know what else? I stopped finding broken ornaments on the floor too. What side are you on? Real or Faux? P.S. these candles make a great holiday gift for just about anyone on your list. Find more natural gift-giving recipes in my book Holiday Essential Oil Gift Making.
What is a metal candle, pouring pitcher?
Ann, a metal candle pouring pitcher is designed for melting wax evenly. The pitcher is seamless, has a pouring spout, and can usually hold up to 4 pounds of wax safely. I purchased mine at Michaels Craft Store, here’s a link https://www.lifenreflection.com/p7x7
What is the greenery that is in the candle in the picture?
Dee, it’s dried lemon balm from my herb garden. It doesn’t really add much fragrance to a candle, but it looks pretty!
Misplaced my password and your site won’t allow me to access the library. Can you reset it so I can add a new password?
Telanie, I just sent you an email with your password.
What would you call the pot the candle is in? Ceramic pot? Candle jar? I’ve been searching for one like it!
Heather, they are ceramic ramekins. You can find them at Target, Home Goods, or Amazon.
SO you threw out tree lights for eight years? Have you reflected on the idiocy? And some went into the POND????
The tree lights never made into the pond. We did manage to reuse the lights a handful of times. But in the last few years that we did have a real tree (which was 9 years ago), my husband cut them off outside and before adding the tree to the pond. However, I know what a waste that was too in hindsight.
Love this! One question, in materials it says 2 pounds of soy wax, but in instructions it says 1 pound. Is the 1/2 Oz essential oil for 1 or 2 pounds? Thanks 🙂
Thanks for pointing that out Holly. I corrected the notes. You will need two pounds of wax if you’re planning to fill four eight-ounce containers. And as for essential oil, it depends on what strength you want the scent to be. If you were using fragrance oil you’d want to add 2 ounces for a 6.3% fragrance load. But, essential oils are very potent, therefore you could use 1/2 ounce to one ounce.
can you use black spruce essential oil for this recipe? Thanks!
Sure can!