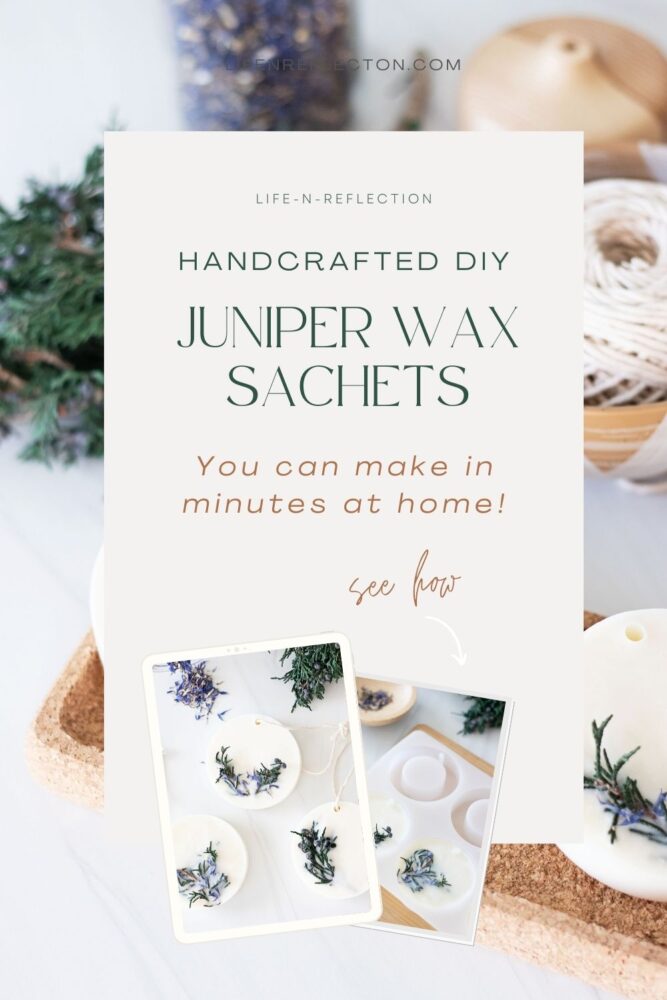
How To Make Scented Wax Sachets At Home
Learn how to make scented wax sachets with a lasting fragrance, the best wax, and ideas to decorate wax sachets.
Y’all have been asking for this wax sachet DIY tutorial. So many of us are candle makers and can’t help but wonder what’s there to make with wax besides candles.
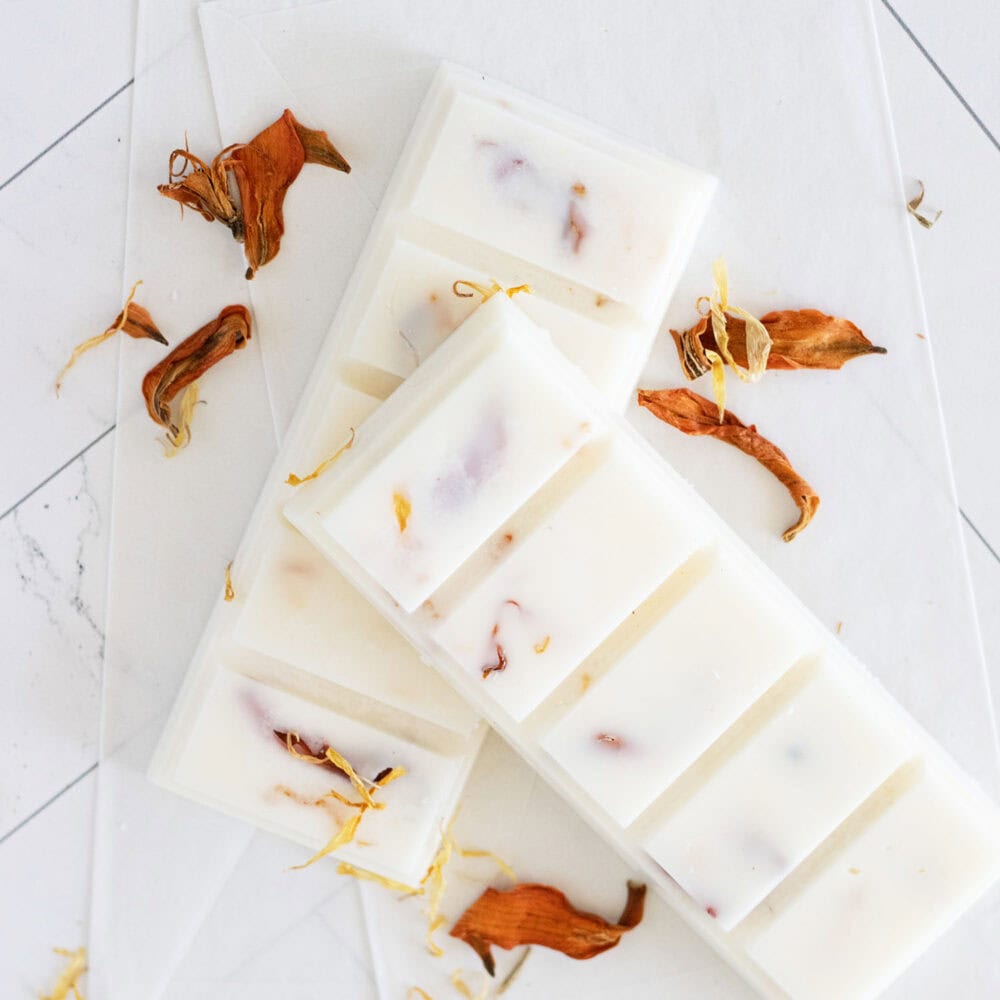
Obviously, wax melts are a great idea, but we’ve all done that. So we find ourselves looking for a new idea. And scented wax sachets are where we’re at!
Not familiar with what are wax sachets used for? Like a candle, wax sachets refresh your home with a fragrant scent. Wax sachet uses can extend to keeping linens smelling fresh and even your clothes.
But I have a feeling you’ve all encountered the same problems I have.
For starters, what mold do you use to make wax sachets? I found several soap-making molds that could create a bar or circle shape for sachets. And if I filled them halfway, I could get about the proper density.
However, no matter what shape or depth I tried, I couldn’t create a hole in the sachets that worked.
I read using a nail and hammer, essentially to drill a hole into the wax, would work. It did not. Instead, the hammering shattered every wax sachet.
Next, I tried using clothespins to hold a straw in the wax during the curing process, like making soap on a rope. Well, I could keep those straws in place, but they wouldn’t come out of the wax once it hardened.
After so many downfalls and wasted candle wax, I stopped trying UNTIL I discovered an easy, no-fail way to make wax sachets at home!
Ready to create? This post post contains some affiliate links. Thank you for your support. Please read the full disclosure policy.

What’s The Easy Way To Make Wax Sachets?
I can’t tell you how thrilled I am to have figured out how to make wax sachets at home with ease! Yes, it was a Hallelujah moment!
It turns out I didn’t need any of those nail or straw tactics; all I needed was the right mold.
Makesy released a collection of wax sachet molds that create the hole we need! They are entirely easy to use. Each wax sachet silicone mold is flexible, reusable, and quickly cleans up.
I used this wax sachet mold to make round sachets with built-in posts that form the holes, providing the ability to hang each sachet. It also has three sections to make round rings or wreath sachets.
I did all the measurements for you:
Which Wax Is Best For Wax Sachets?
For wax sachets, opt for beeswax or soy wax. Beeswax offers a natural scent and longevity, while soy wax ensures eco-friendliness and easy customization. Avoid paraffin, as it’s not environmentally friendly, and coconut or palm wax, as they can be too soft.
for you
start simplifying today
the simple living library
Join thousands of members and gain access to all past, current, and future items in the Library, along with our exclusive Simple Living Weekly Edition.
How Much Fragrance Do You Add To Wax Sachets?
What do you put in wax to make it smell good? Fragrance
I recommend adding essential oils or eco-friendly fragrances to make a scented wax sachet. What’s most important is adding the right amount.
After adding up the amount of wax I needed to make 3 sachets, I entered that number into my quick fragrance calculator. I selected a strong 12% fragrance load because, without the need for flame, I didn’t worry about common candle problems.
The amount I needed was .63 ounces. So, I was so excited when I found one-ounce natural fragrance bottles from Makesy at my local Hobby Lobby (Did you see my Instagram Reel?)!
If you are making a different amount of sachets, you can easily find the correct amount of fragrance with the calculator.
How Do You Decorate Wax Sachets?
With all that figured out, it’s time for the fun part – decorating the sachets!
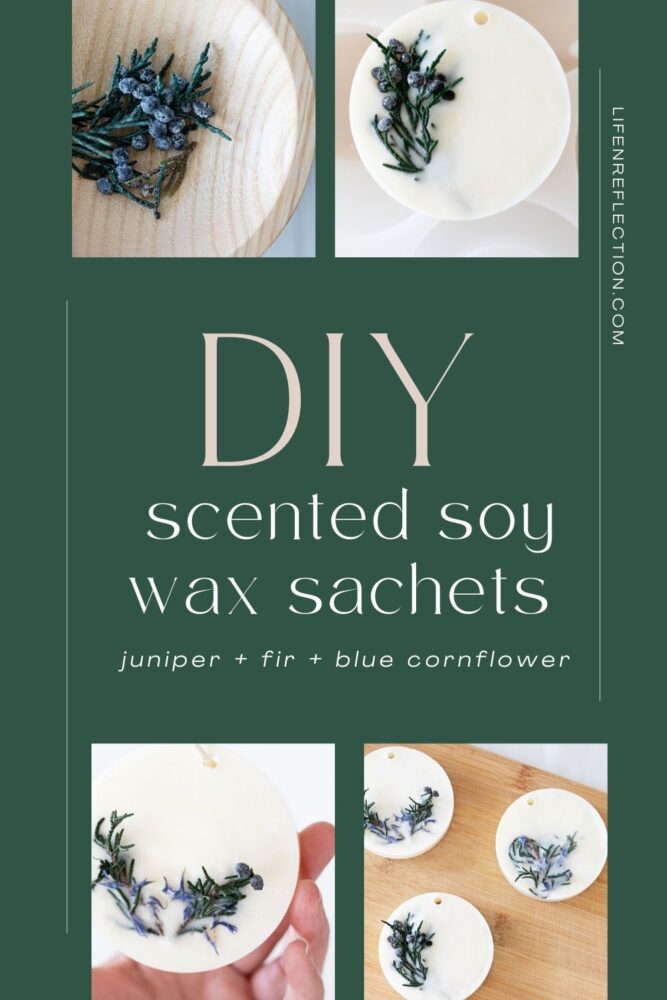
To create a botanical wax sachet, opt for dried or pressed flowers. For seasonal wax sachets, you might choose cinnamon sticks or whole cloves. I chose juniper evergreen stems and blue cornflower petals blended with the crisp juniper fir fragrance.
Psst – You can find all the above at Makesy! Use my code CreateWithKristy10 to save 10% off!
NOTE: I tested adding the decorations into the silicone mold first, as well as adding them right after pouring the wax. I found both hid the elements under the wax. So, these are the best methods I found:
2 Ways To Add Decorations To Wax Sachets
So, as you can see, I find it best to add the decorations after the wax has set up in order to showcase them.
Related To
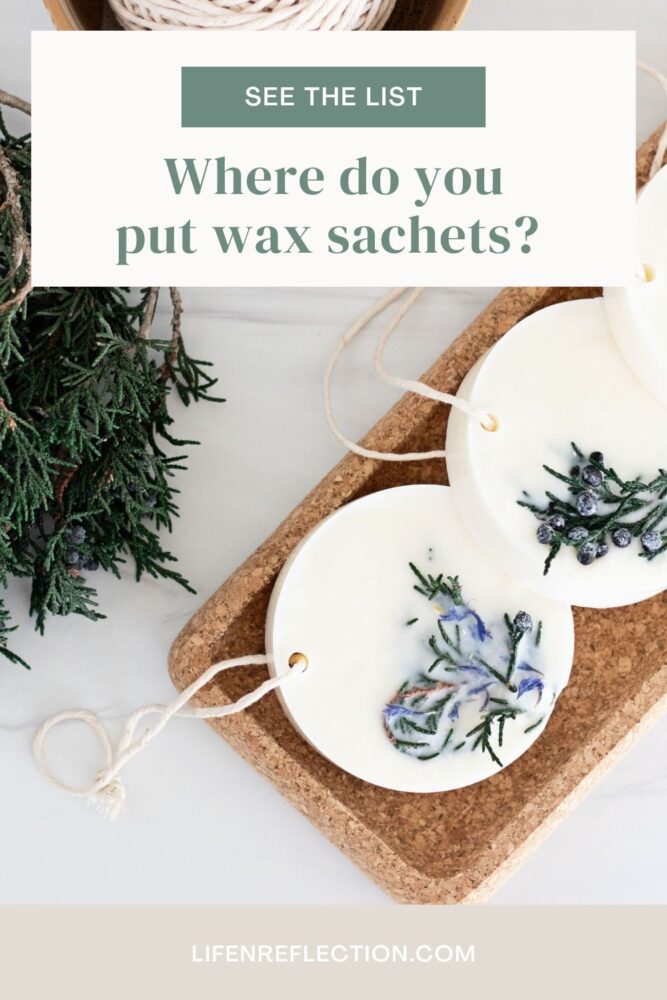
Where do you put wax sachets?
With a few ideas brewing, you’re likely wondering where you put wax sachets. It’s simple to enhance spaces with beautiful scents by strategically placing wax sachets. Consider these ideas and tips:
Get ready to refresh your spaces with fragrant DIY wax sachets! Honestly, I’m so happy to finally share a wax sachet recipe that’s lastingly fragrant, beautifully decorated, and easy to create!

How To Make Scented Wax Sachets Step-By-Step
This is for all of you asking how to make scented wax sachets at home! Read through the steps, print them out if you like from the button below, watch the video tutorial, gather your supplies, and get started.
Scented Wax Sachets
Ingredients & Supplies
TOOLS YOU’LL NEED

Scented Wax Sachet Instructions
Prep Your Workspace
Before you begin, you may want to cover your surface with parchment paper or a silicone mat to make any spills easy to clean up. Then, gather all your supplies nearby.
Trim Juniper Branches
Trim five or more stems from the juniper branches to fit inside the silicone mold sections with gardening shears.
Measure & Pour Fragrance
I used my quick fragrance calculator to select a strong 12% fragrance for .63 ounces juniper fir eco fragrance. Pour into a glass beaker and set aside.
Measure Wax
Next, place a medium glass measuring cup on a digital scale and scoop 5.25 ounces soy wax designed for tarts.
Stabilize Mold and Melt Wax
Lay the silicone mold on a wood cutting board for stability. Then, place the wax-filled pitcher in the microwave. Melt at 30-second intervals until melted. (Note: the wax I used is microwave-safe)
Add Fragrance
Remove the melted wax from the microwave and pour in your fragrance. Stir slowly to meld.
Pour Fragrant Wax
Next, slowly pour the fragrant wax into the three round sections of the wax sachet silicone mold. Allow the wax to cool for several minutes until it has a cloudy appearance.
Decorate Sachets
Once the wax has begun setting up and appears cloudy, add the decorative elements. Place your largest items first, like the 5 juniper stems I added. I used a popsicle stick to tuck some pieces into the wax carefully.
Let the wax set some more, then add your small elements to keep them from sinking into the wax. I sprinkled blue cornflower petals around the juniper to add color and fragrance.
Remove Sachets & Add Twine
Once the sachets have completely cooled and hardened (I waited several hours), pop each out of the silicone mold, as seen in the video tutorial.
Note: If the surface of a wax sachet isn’t smooth once cured, use a heat gun to melt the areas on the surface of the sachets that need smoothing. Allow the wax to cool and harden again before removing.
Then, add twine through the hole of each wax sachet. (I tried using that gorgeous evergreen raw silk ribbon in the photos and videos, but it was too wide.) Tie the twine off while ensuring adequate length to hang each sachet.

How To Make Wax Sachets
Transform your home with the fresh scent of DIY wax sachets! Learn how with my easy-to-follow tips and instructions.
Materials
- 1 wax sachet silicone mold
- 5.25 ounces soy wax for tarts
- .63 ounces juniper fir eco fragrance
- 5 juniper stems
- 1 tablespoon blue cornflower petals
Tools
- Digital scale
- Heat gun
- Glass measuring cup
- Gardening shears
- Twine
- Silicone Mat
Instructions
- Prep Your Workspace: Before you begin, you may want to cover your surface with parchment paper or a silicone mat to make any spills easy to clean up. Then, gather all your supplies nearby.
- Trim Juniper Branches: Trim five or more stems from the juniper branches to fit inside the silicone mold sections with gardening shears.
- Measure & Pour Fragrance: I used my quick fragrance calculator to select a strong 12% fragrance for .63 ounces juniper fir eco fragrance. Pour into a glass beaker and set aside.
- Measure Wax: Next, place a medium glass measuring cup on a digital scale and scoop 5.25 ounces soy wax designed for tarts.
- Stabilize Mold and Melt Wax: Lay the silicone mold on a wood cutting board for stability. Then, place the wax-filled pitcher in the microwave. Melt at 30-second intervals until melted. (Note: the wax I used is microwave-safe)
- Add Fragrance: Remove the melted wax from the microwave and pour in your fragrance. Stir slowly to meld.
- Pour Fragrant Wax: Next, slowly pour the fragrant wax into the three round sections of the wax sachet silicone mold. Allow the wax to cool for several minutes until it has a cloudy appearance.
- Decorate Sachets: Once the wax has begun setting up and appears cloudy, add the decorative elements. Place your largest items first, like the 5 juniper stems I added. I used a popsicle stick to tuck some pieces into the wax carefully. Let the wax set some more, then add your small elements to keep them from sinking into the wax. I sprinkled blue cornflower petals around the juniper to add color and fragrance.
- Remove Sachets & Add Twine: Once the sachets have completely cooled and hardened (I waited several hours), pop each out of the silicone mold, as seen in the video tutorial. Then, add twine through the hole of each wax sachet. (I tried using that gorgeous evergreen raw silk ribbon in the photos and videos, but it was too wide.) Tie the twine off while ensuring adequate length to hang each sachet.
Notes
If the surface of a wax sachet isn’t smooth once cured, use a heat gun to melt the areas on the surface of the sachets that need smoothing. Allow the wax to cool and harden again before removing.
Recommended Products
As an Amazon Associate and member of other affiliate programs, I earn from qualifying purchases.


Did you make this?
To share your creation on Instagram, mention @lifenreflection or tag #lifenreflection! What did you love most? Leave a comment below!
How long do wax sachets last?
How long wax sachets last varies, typically lasting 2-6 months. You can enhance their lifespan with a few tips for best use.
- Keep in a cool, dry place away from direct sunlight
- Wrap in tissue or slip inside a muslin bag to prevent wax stains
- Hang on a hanger, place in a drawer, or tuck inside a vase for optimal fragrance diffusion
Find this helpful?
Share it on Pinterest
And while you’re there, be sure to follow Life-n-Reflection for more inspiring ideas.