Herbal Citrus DIY Shower Steamers: A Gift-Worthy Recipe
DIY shower steamers guide to large, gift-worthy shower discs featuring dried orange slices and fresh rosemary that fill your shower with coziness.
Published in my column of Willow and Sage Magazine, these DIY shower steamers are a welcome addition in the cooler months of the year. Created with natural citrus, herbal, and woodland scents, they are undeniably cozy.
Designed to mimic a bath bomb, yet specially crafted for the shower, they are the ultimate convenience. (There’s no need to wait for the bathtub to fill when you can pop one in the shower with you!)
The comforting aroma of orange, grounding cypress, and fresh rosemary instantly fills the steam of the shower. Surrounding you in a cloud of coziness. I’ve made many shower steamers, but there’s nothing quite like this combination.
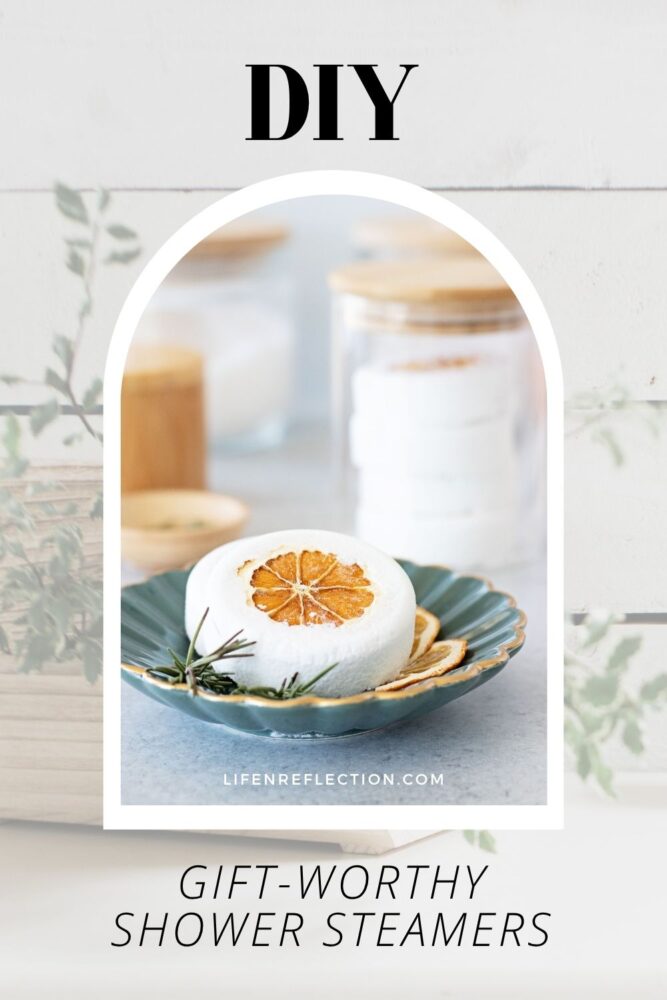
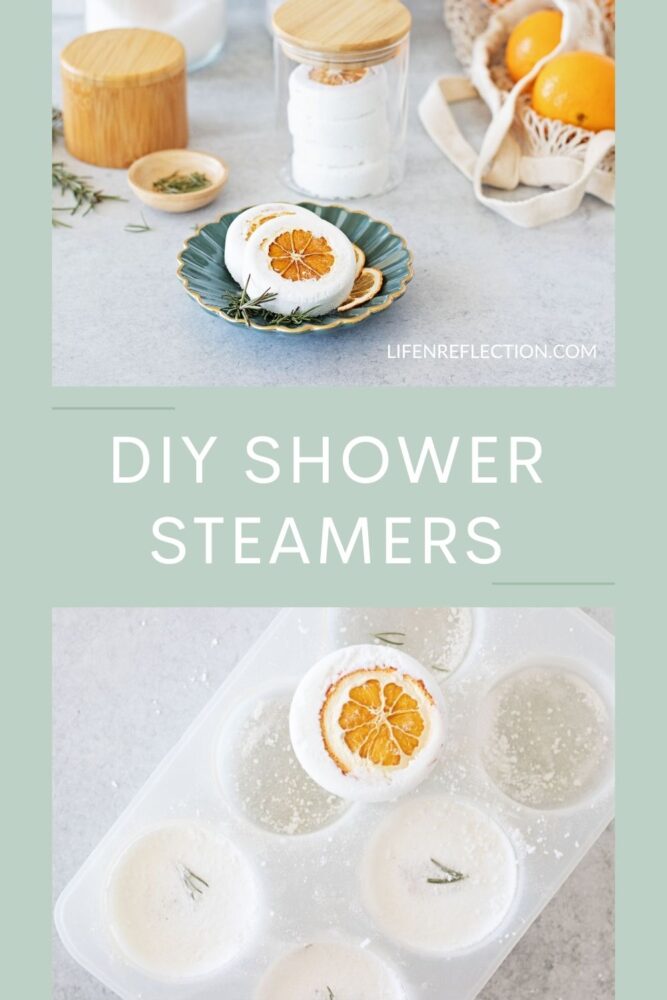
Plus, each large shower disc is filled with a whole dried orange slice and sprigs of handpicked rosemary. Their generous size and beauty really make them gift-worthy!
I packaged a few up for two of my close friends, and they both commented on the rich aroma and asked, “What did I put in them?”, LOL!
So, if you’re looking for a sweet, fragrant gift to share or a treat for your senses,
I’ll point in the right direction with clear instructions on how to make shower steamers (video included). As well as how to dry oranges to preserve their vibrant hue, scent, and flavor.
This post contains some affiliate links. Thank you for your support. Please read the full disclosure policy for more details.
Drying Orange Slices
It has long been a tradition in our family to dry oranges, apples, and grapefruit for holiday decorating. From wreaths and garlands to decorating the tree, they add a sense of nostalgia to our holiday decor like no other. But this year, I came up with the idea to use orange slices in shower steamers, and I’m so glad I did!
Drying citrus has resurged in popularity, and I’ve enjoyed sharing my tips and tutorials over the past year. If you missed them, check out my tutorials on drying apples and dehydrating lemons.
If this is your first time preserving citrus, have no fear—with these two methods, you’ll have plenty to enjoy this holiday season!
Here’s What You Need:
- Fresh Navel or Blood Oranges
- Sharp knife or mandoline
- Cutting board
- Baking sheets
- Parchment paper
- Oven or dehydrator
Prepare Oranges: Wash the oranges thoroughly under running water to remove any dirt or residue. Pat them dry with a clean kitchen towel. Then, place the oranges on a cutting board.
Slice Oranges: Using a sharp knife or mandoline, slice the oranges into uniform rounds, approximately ¼ inch thick. Aim for consistency in thickness to ensure even drying. (Watch my video to learn how to slice citrus using a madonline quickly.)

How To Dehydrate Orange Slices
1. Fill Trays: Begin filling each dehydrator tray. Place orange slices spaced briefly apart in a single layer. Do not overlap oranges.
2. Begin Dehydrating: Stack filled trays on the bottom of the dehydrator. (If you’re drying a whole bag of oranges, you can stack multiple trays.) Then place the top on. Start dehydrating with an initial boost of heat at 145°F / 63°C for two hours.
Optionally, turn off the dehydrator to rearrange the orange slices, remove a tray, and speed up drying. (Slices will shrink somewhat when drying.)
3. Lower Temp: Lower the temperature to 135°F / 57°C and dehydrate until thoroughly dry, approximately 4 to 6 more hours.
Frequently Asked Questions
How do you know when they are dry?
To determine if your oranges are dry enough, gently press a slice between your fingers to check for dryness. If it feels leathery and no moisture escapes, then it’s ready.
Remember, patience is key when drying oranges. It’s better to err on the side of caution and let them dry a little longer than risk them being too moist.
How long will they last?
Dried orange slices hold up best when stored inside an airtight container in a cool, dry place away from sunlight. Each can last one to two years for culinary purposes. And, well, indefinitely for decorative purposes.
How do you oven-dry oranges?
Learn how to oven-dry at our sister site, Farmhouse Chic Living, with a simple tutorial.
for you
start simplifying today
the simple living library
Join thousands of members and gain access to all past, current, and future items in the Library, along with our exclusive Simple Living Weekly Edition.
You May Also Like
Create cozy handmade candles for every season with DIY dried citrus candles!
With a whole orange slice packed in each DIY shower steamer, these look like something you’d find in a boutique spa, but you can make them right at home. Ready to get started?
Creating Herbal Citrus DIY Shower Steamers For Cozy Mornings
It’s no surprise that shower steamers have rapidly gained popularity. Whether you’re starting your morning with a quick shower or ending the day with a long steam shower, they’re the perfect addition to your routine.
Each is gorgeous, generously sized, and makes the whole bathroom smell like a winter retreat!
Shower Steamer Ingredients and Supplies:
If you’d like to see the process step by step, I filmed it all, so you can watch the full tutorial on my YouTube Channel. Pour yourself a mug of spiced tea, press play, and join me in creating these cozy steamers!
🌿 Fresh Herb Tip: If you are making these ahead of time to store or package as holiday gifts, make sure to use completely dried rosemary sprigs rather than fresh stems. Removing the moisture ensures your steamers stay pristine and perfectly shelf-stable in their gifting jars for months!
How To Make Shower Steamers
let’s get started
1. Combine Dry Ingredients: Add 1 cup of baking soda, 2 tablespoons of Epsom salt, and 1/2 cup of citric acid into a large glass or metal mixing bowl. Whisk well with a stainless steel whisk to combine.
2. Add Wet Ingredients: Whisk while adding 10 drops of rosemary essential oil, 15 drops of cypress essential oil, and 30 drops of orange essential oil into the dry mixture. (For reference, a 5ml bottle of essential oil contains 100 drops.)
Then spritz the mixture with up to 2 tablespoons of witch hazel from a spray bottle, whisking as you go (If the mixture begins to fizz or foam, stop adding witch hazel or slow down the rate you are adding it).
Squeeze the shower steamer mixture in your hand. If it holds its shape when you drop it back into the bowl, it’s ready!
3. Add Oranges: Sprinkle a small amount of the mixture in each section of the mold. Then add an orange slice over the thin layer.
4. Add Rosemary & Press: Scoop more mixture over the orange slices, filling until ¾ full. Then snip one or two sprigs from the rosemary stems and add to each steamer. Now, cover with the remaining shower steam mixture and gently press the bottom of a dry measuring cup into each steamer to form.
5. Dry and Reveal: Allow the shower steamers to dry uncovered in the silicone mold for 8 hours or overnight. After drying, place a cookie sheet or wood cutting board on top of the shower steamers in the mold. Turn it upside down, then, as needed, gently press each shower steamer out of the mold.
Did you make this?
To share your creation on Instagram, mention @lifenreflection or tag #lifenreflection! What did you love most? Leave a comment below!
You’ll want to store these in an airtight container or stack on decorative trays with fresh rosemary and dried orange slices, and wrap in sealed bags for gifting.

How To Use A Shower Steamer
Enjoy your own cozy shower designed for cooler months with bright citrus, herbal notes, and a whole dried orange slice in every disc.
For best results, follow these steps to use each shower steamer:
- Close all the doors and windows in your bathroom. And turn off any fans for the full experience.
- Put a shower steamer on the edge of the shower floor, ledge, or built-in nook. Just out of the water’s reach is ideal. (Shower steamers should never be submerged or placed under the direct spray of water.)
- Turn on the shower and step in! When droplets of water or steam reach the shower steamer, it will begin to melt and release the cozy aroma into the steam.
TIP – To make a shower steamer last longer, aim for droplets of water to bounce off the shower walls or floor and hit the shower steamer. It’s even better if the shower’s steam alone melts the disc. Because, like a candle, the slower the burn, the better the fragrance.

Find this helpful?
Share it on Pinterest
And while you’re there, be sure to follow Life-n-Reflection for more inspiring ideas.
These DIY shower steamers are a must-have for anyone who enjoys a moment of comfort in their daily routine! I know you’ll enjoy the warmth and aromatherapy they bring to the shower.