Learning everything there is to know about cutting board care was a must for me!
We were gifted a generously sized, beautiful wood cutting board variating with tone and color, natural wood knots, and a carved juice well for our wedding nearly fifteen years ago. It was one of our few prized possessions in our first apartment in Chicago.
I know many joke that their first apartment is tiny, but the kitchen was BEYOND TINY! (I’ve had closets since then bigger than that kitchen.)
Needless to say, I learned to maximize our space by placing the cutting board over the kitchen sink, giving us more countertop space, if you will. While this had a two-fold effect, extra space, and good encouragement to keep dirty dishes out of the kitchen skin – it also was the demise of our beloved cutting board.
Ready to get started? This post contains some affiliate links. Thank you for your support. Check out the full disclosure policy for more details.
What happened?
Little black spots began to decorate our cutting board, commonly referred to as, mold! Laying the board on top of a damp sink for long periods of time caused mold to grow into the wood.
My husband said we had to toss it. And at the time, I was lost on how to save it.
Fortunately, in recent years I have learned how to prevent mold growth in wood cutting boards and how to restore them to their prime with natural conditioning spoon butter.
What is Spoon Butter?
Spoon butter also is known as wood butter or cutting board cream is a traditional wood conditioning cream. (Say that three times fast!)
Just like body butter, spoon butter can help prevent drying and cracking. It can be used for wooden boards, wood spoons, wood handles on utensils, and even wooden cleaning brushes.
It’s a simple mixture of oil and beeswax that helps prevent cracking, splitting, and in short prolong the lifespan of your kitchen prep tools.
Cooks’ Illustrated said, “homemade spoon butter is a more durable, water-repellent option for wood kitchenware compared to mineral oil.” In fact, they conducted a study testing the effectiveness of mineral oil and spoon butter. The study revealed mineral oil left wood kitchenware dried, ashen, and with areas of rough spots. While spoon butter retained a protective coating leaving kitchenware with a noticeable smooth appearance.
If your wood kitchen tools are starting to look dried out from regular use it’s time to change the way you care for them. With a little thought and a conditioning spoon butter treatment, you can extend their life, lasting decades in your home.
You May Also Like
How to clean fingerprints, smudges, and spills from stainless steel appliances.
How do you make a conditioning spoon butter to extend the life of your wood kitchenware?
Like your mother’s apple pie recipe, it all comes down to choosing the best ingredients to create an incredible spoon butter recipe! We’ll look at the three main ingredients needed to make spoon butter and the best option for utensils and wood cutting board care below.
#1 Choose Your Wax
Beeswax is a non-toxic, food-safe, natural wax produced by honey bees. It is a popular ingredient for cutting board care because pure beeswax has water-resistant traits that prevent drying and cracking. Not to mention its hydrating ability to maintain a beautiful shine in wood. I prefer beeswax pellets over beeswax bars for creating DIY recipes, because the pellets are easy to measure and melt more quickly than bars!
Carnauba Wax is a great choice for vegans. Derived from the leaves of palm trees native to Brazil, locals call it Brazil wax and fans often refer to it as the “Queen of Waxes” prized for its multipurpose use. Did you know carnauba wax is a key ingredient in dental floss, automobile wax, and vegan lip balm and lipsticks? Well, it can also be used for wood cutting board care, butcher blocks, and wood utensils. And like beeswax, it’s non-toxic and completely food safe.
#2 Choose Your Oil
What to Avoid:
It may be tempting to use average cooking oil you have on hand, such as canola oil, vegetable oil, or sunflower oil for wood cutting board care. But most of these vegetable oils should be avoided when it comes to maintaining your wood kitchen tools.
You see, vegetable oils go rancid fairly quickly, a process of decomposition or chemical change that results in a foul smell and unpleasant taste. Who wants to prepare food with kitchenware that smells awful and may cause your food to taste bad? Count me out!
What to Use:
Walnut Oil is often an overlooked oil extracted from English walnuts, found in the gourmet aisle of the grocery store. It is non-toxic, rich in saturated fats, and linoleic acid a polyunsaturated omega-6 fatty acid. It has a pleasant scent and you don’t have to worry about it spoiling easily, like vegetable oils.
In fact, walnut oil is used for a wide range of things from culinary uses to wood treatments and wood finishing products as a method to preserve the wood. It’s even used in personal care products to extend shelf life. All of which makes, walnut oil is an excellent ingredient in spoon butter!
Coconut Oil is vegan-friendly and a great alternative to walnut oil for those of you with a nut allergy concern. Extracted from mature coconuts, it’s high in saturated fats like walnut oil. And coconut oil is effective for maintaining wood and bamboo cutting boards. It is slow to oxidize but, over a long period of time it will become rancid.
Luckily, you can purchase highly refined coconut oil, specifically designed to care for wood cutting boards. It is odorless and doesn’t retain the taste of coconut. So, it won’t interfere with whatever recipes you are preparing! (Don’t let the bottle fool you – it’s not mineral oil.)
#3 Choose Your Lemon
Lemon Juice is an incredible green cleaning tool! It contains citric acid – a mild acid that fights water spots, hard water stains, and grime. A great combination of properties to prolong the life of your kitchen prep tools!
Lemon Essential Oil is a powerhouse in homemade cleaning recipes, commonly used to de-grease, remove stains, and deodorize. Its zesty aroma wipes out strong, unpleasant odors and will make your cutting boards smell amazing!
How to Condition Wood Cutting Boards and Wood Utensils
If you have wood surfaces, kitchenware, or wooden cleaning tools in your kitchen that need a little TLC – treat them well with a homemade spoon butter. Use the following four-step method to condition and main your wood kitchenware in a mere handful of minutes.
All you’ll need is a soft kitchen towel and my homemade wood recipe I share below!
4 Easy Steps to Caring for Wooden Cutting Boards, Butcher Blocks, & More
1st Step: Clean the Wood
The first step to caring for any wood surface or tool is to keep it clean! Start with my techniques to naturally clean, remove stains,and deodorize wood. Then let the items you’ll be conditioning, thoroughly dry before moving to the second step.
2nd Step: Apply wood Butter
Using a clean, soft kitchen towel apply the spoon butter in an even layer over the wood. Work the butter in circular motions into the grain of the wood.
3rd Step: Allow to Soak and Condition
If you haven’t conditioned your wooden tools in a while, you may find another coat is needed after the first has had some time to soak in. Once you are finished applying spoon butter allow it to soak and condition for a minimum of four hours or overnight if possible.
4th Step: remove excess butter
Using a dry, clean kitchen cloth or paper towel, buff away excess butter. This will keep your woodenware from feeling damp or sticky.
How do you care for wooden spoons and other utensils?
The process is quite similar to caring for wooden spoons and other utensils as it is for cutting boards and butcher blocks. When doing so, you’ll find that they don’t crack as easily or dry out quickly with regular use. Here are a few quick steps on how to clean, moisturize and protect wood salad bowls, spatulas, spoons, and more.
3 Steps to Wood Utensil Care:
How Often Should You Condition Woodware?
- Wooden utensils and cleaning tools can benefit from conditioning every few weeks.
- Whereas wooden cutting boards or kitchenware not regularly used, are best to condition every few months or whenever your they begin to look dry or dull.
Make Conditioning Spoon Butter To Restore and Maintain Wood Kitchenware
I have found that this recipe for lemon conditioning spoon butter is by far the best for providing a long-lasting finish and beauty to my wood kitchen tools! Created with a revitalizing blend of beeswax, walnut oil, and lemon essential oil – it’s helps prevent drying and cracking when applied to your wood cutting boards, bowls, salad tongs, and other utensils.
Ultimately creating a rejuvenating wood with a superior level of protection! You can easily customize this spoon butter recipe below by selecting ingredients based on your preferences for vegan-friendly and nut allergy-free products.
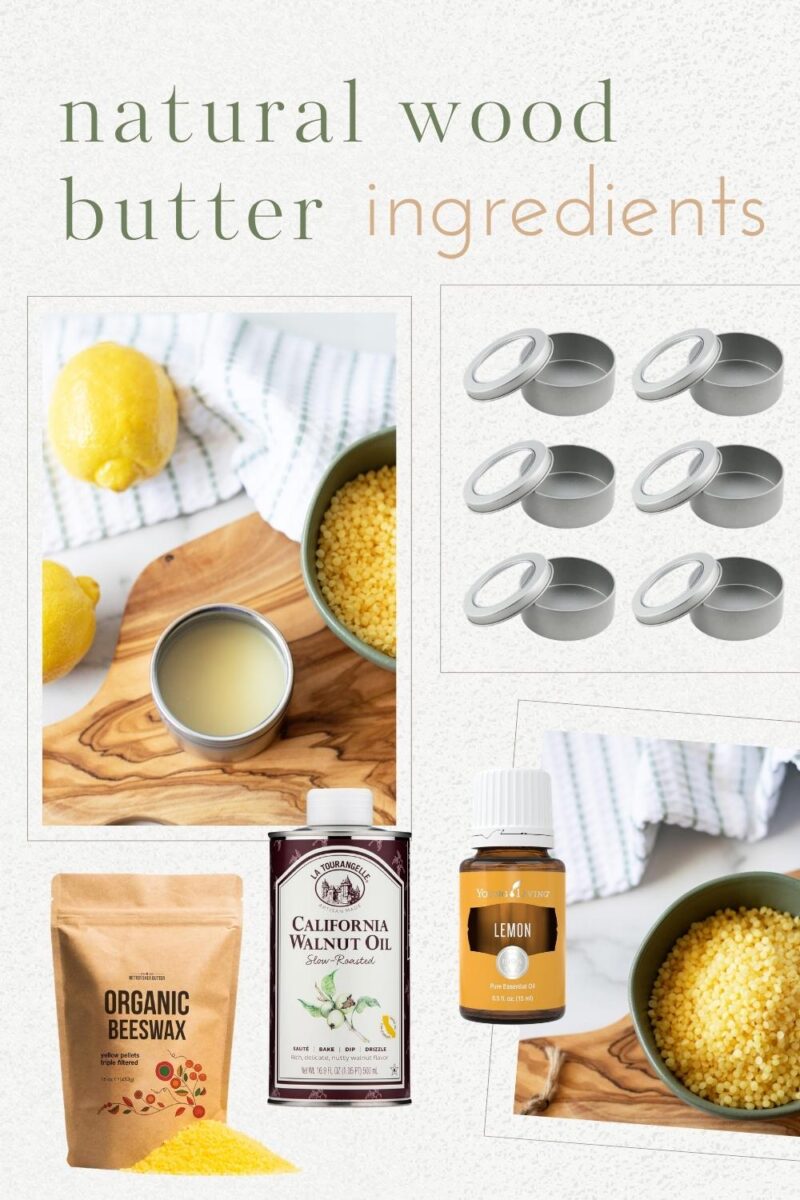
Lemon Conditioning Spoon Butter Ingredients:
- Choose 3 ounces of walnut oil or coconut cutting board oil
- Choose ⅛ cup of beeswax pellets or carnauba wax flakes
- Choose 3 drops of lemon essential oil or ⅛ teaspoon of lemon juice
- 2 metal 2-ounce tins with lids

How to Make Spoon Butter:
Using the double boiler method fill the bottom pot with a small amount of water. Place it on the stovetop and begin to warm on medium to low heat. Add a ⅛ cup of wax to the top pot.
Melt wax on low heat stirring occasionally. Next, add 3 ounces of oil to the melted wax. Stir until the mixture is completely melted and combined.
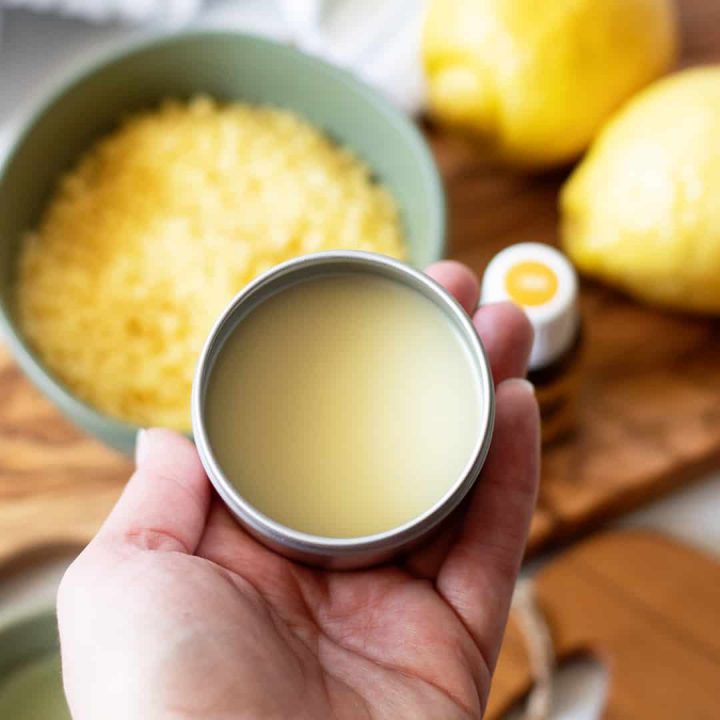
Remove it from the heat and add 3 drops of lemon essential oil or ⅛ teaspoon lemon juice. Stir to incorporate the lemon into the spoon butter. Then, carefully pour the mixture into each metal tin and allow to cool before placing the lids on top.
Tip: This homemade spoon butter recipe will keep for a minimum of 4 months. I recommend making natural products in small batches such as this. Simply make more when you have used up the first batch.
Lemon Conditioning Spoon
This simple lemon conditioning spoon butter made of oil and beeswax will help prevent cracking, splitting, and in short prolong the lifespan of your kitchen prep tools.
Materials
- 3 ounces walnut oil or coconut cutting board oil
- ⅛ cup beeswax pellets or carnauba wax flakes
- 3 drops lemon essential oil or ⅛ teaspoon lemon juice
- 2 2-ounce metal tins
Instructions
- Using the double boiler method fill the bottom pot with a small amount of water. Place on the stovetop and begin to warm on medium to low heat. Add a ⅛ cup of beeswax pellets or carnauba wax flakes to the top pot.
- Melt wax on low heat stirring occasionally. Next, add 3 ounces of walnut oil or coconut cutting board oil to the melted wax. Stir until the mixture is completely melted and combined.
- Remove from heat and add 3 drops of lemon essential oil or ⅛ teaspoon lemon juice. Stir to incorporate the lemon into the spoon butter. After carefully pour into metal tins and allow to cool before placing the lids on top.
Notes
This homemade spoon butter recipe will keep for a minimum of 4 months. I recommend making natural products in small batches such as this. Simply make more when you have used up the first batch.
Recommended Products
As an Amazon Associate and member of other affiliate programs, I earn from qualifying purchases.


Making spoon butter takes a little effort upfront, but the results are well worth it. And you’ll quickly find using spoon butter for your cutting board care has long-lasting results. Results you may want to share with a friend!
I find this spoon butter recipe makes a great housewarming gift. You can easily double or triple the recipe above to make several tins to gift.

Oops! Did I forget to mention this recipe has a dreamy, lemon honey scent that will even moisturize your hands? And no gloves are needed for this kitchen clean-up!
Bookmark or Pin this lemon conditioning spoon butter to make later And tag #lifenreflection on Instagram to share your natural cleaning tips with us.
Very easy to make! I can’t wait to try it. Thanks for a great, all-natural recipe. I opted to use walnut oil but haven’t had a chance to try it out yet!
Awesome!!