How to Make 3 wick Candles Smell Stronger with our Multi Wick Candle Making Tutorial
If you have never experienced a 3 wick candle, it’s nothing ordinary.
Instead of one wick, there are three in a multi-wick candle! It is attention-grabbing, with an impressive amount of flickering illuminating your space and releasing a stronger scent. It’s like encasing all the ambiance of three candles in one!
If you’ve already mastered the basics of candle making: choosing a candle wax type, measuring wax, wick types, and sizes, and calculating candle fragrance, then it’s time to take it an extra step and learn how to make 3 wick candles.
I’m here to walk you through the ins and outs of multi wick candles. From FAQs to a full candle making tutorial and a printable candle wick size chart for multiple wick candles. We’ll cover it all, and you’ll be ready to make your first attention-grabbing 3 wick candles shortly!
This post contains some affiliate links for your convenience; read the full disclosure policy.
When should you use multiple wicks??
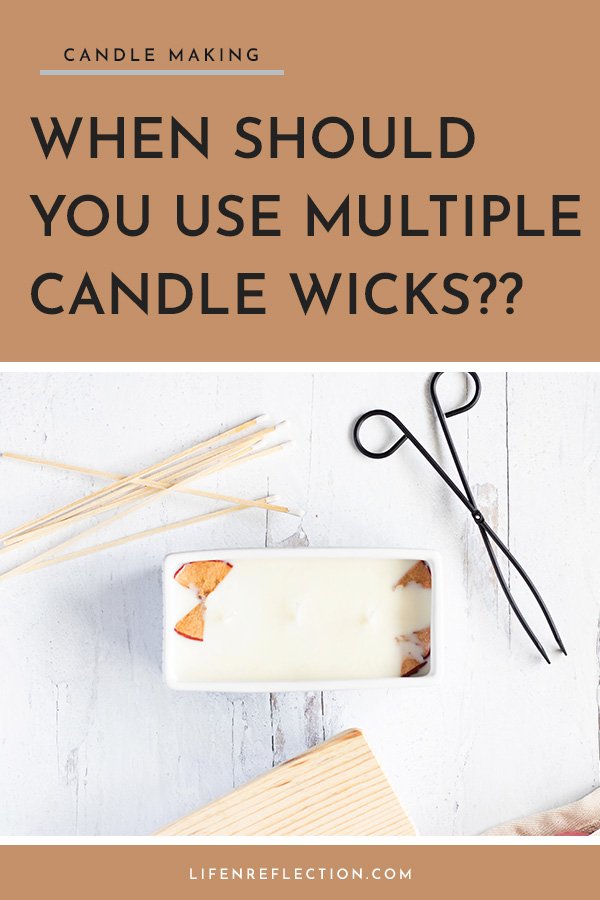
Wicks are one of the most essential parts of a candle – for obvious reasons. Their unique braid of paper and cotton or strip of wood vaporizes candle wax and releases its fragrance when scented. But when should you use multiple wicks? It all comes down to your candle container shape and size.
For example, if your candle container is elongated like the one I used to make 3 wick candles in the photo above, you will need more than one wick to successfully achieve a full melt pool. (Unfamiliar with candle making terms? Grab our printable candle glossary in the Simple Living Library.) The same can be said for large round candle bowls and popular bread dough bowl candles.
Related To: How to Make a Coffee Mug Candle
Why Multiple Wicks?
Another reason many love using multiple wicks is the instant atmosphere a 3 wick candle vs. a single-wick candle creates. If you’re questioning, are 3 wick candles better? The answer is yes – the dazzling display of light and enveloping strong scent from a 3 wick candle is one to be coveted.
Not only will a larger candle container hold more wax and, therefore, scent, but the use of multiple wicks will also extend the scent throw. So if you’re additionally wondering, do 3 wick candles smell stronger? Absolutely yes! The high fragrance load and extended surface area of scented melting wax will definitely fill a space more than a single wick candle.
And not to go unmentioned, when you select the right candle wick size and space them evenly, multiple wicks can actually extend the life of a candle. The use of more than one wick decreases the chance of common candle problems like tunneling.
Related To: How to Choose the Best Candle Scents

Does size matter?
Aesthetics aside, sometimes it’s necessary to multi-wick a candle. Rather we simply want the appearance or experience of a 3 wick candle when we choose a large candle container; a single wick just won’t suffice.
When you look at a candle wick size chart, you’ll notice that even the largest wicks can only adequately be used for up to a 5-inch diameter candle. Therefore if your candle container is more than 5 inches in diameter, you’ll need multiple wicks!
But how do you figure out what size of a wick to use for a multiple wick candle? Or, in other terms, how do you make a multi-wick candle? I came to the same question when I was figuring out how to make a 3 wick candle burn evenly.
Here are the steps I take to choose the correct candle wick size and amount of wicks for a multiple wick candle:
1. Measure:
This is the starting point to determine how many wicks you can use. Measure the diameter of your candle container (take a full measurement across the top of the vessel opening from one side to the opposite side).
2. Calculate:
Divide the diameter by the number of wicks you want to use. Such as 2, 3, or 4, depending on the size, and note the result.
3. Compare:
If the result is a 2, you’ll want a candlewick designed for a 2” diameter candle. 3? Choose a candlewick designed for a 3” diameter candle. And so on and so forth.
As an illustration, a six-inch diameter candle container could make a double or triple wick candle: 6” container ÷ 2 wicks = 3” wick size and 6” container ÷ 3 wicks = 2” wick size.
So, if the diameter of the container is at least 4 inches, you can make a double wick candle. If the diameter is between 4 and 12 inches, you can make a 3 wick candle. And beyond 12 inches, you can use more than 3 wicks.
Use these three steps as your guide to making multi-wick candles. But keep in mind you may want to do a burn test and then wick up or wick down based on your results for an even burn.
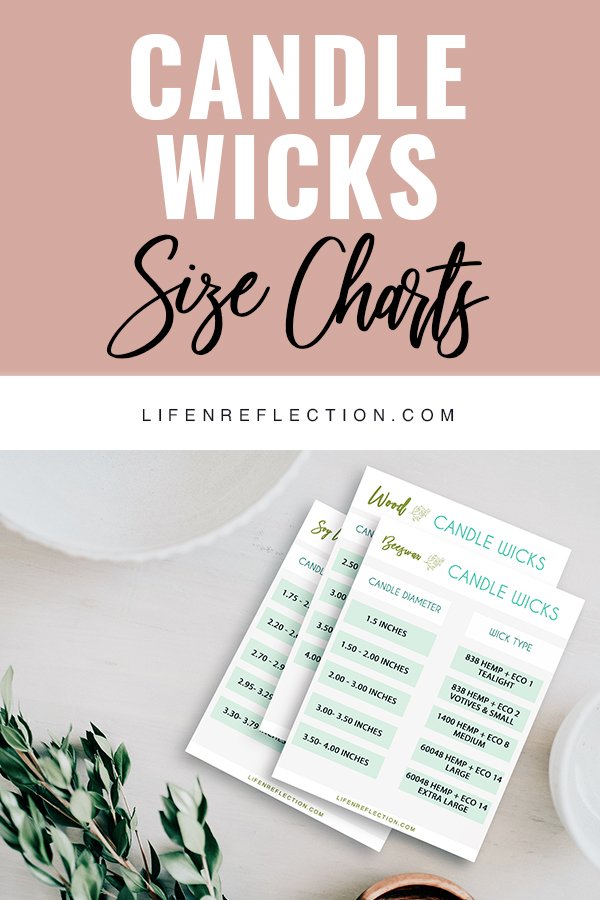
Use one of our many printable candle wick size charts in the Simple Living Library to select your wick type and size to make multiple wick candles for just about any container you choose!
How to Space Multiple Candle Wicks
After determining the number of candle wicks you’ll need and the candle wick size, the next major component to making multiple wick candles is placement. All that math will equate to a mess of hot wax if your wick placement is wrong.
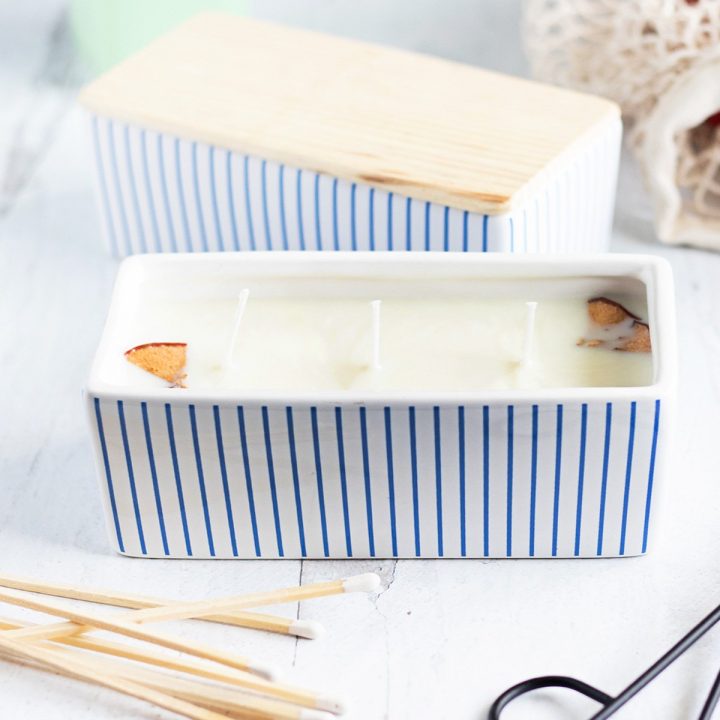
Where do you place wicks in a multi-wick candle? The shape of your candle container sums it up! If the container is a long rectangular shape, such as the one used in this candle making tutorial, the wicks need to be spaced evenly down the center length of the candle. An even amount between each other and the sides of the container. (Think of inches marked on a rule.)
For round shape candles, a triangle placement works best for 3 wick candles. Place three wicks evenly apart at each point of a triangle, centered in the candle container. In terms of double wick candles in a round container, place them evenly apart and centered in the container.
Making multiple wick candles takes some experimenting. But when you get it right, it’s well worth the effort! Get started now with our multi-wick candle making tutorial featuring creamy natural soy wax poured into a deep blue and white pinstripe container. Blended with rich salted caramel and sweet notes of crisp apple and warm cinnamon phthalate-free and cruelty-free fragrance. Topped with bits of dried apple slices and three lead-free cotton wicks for a rich multi-layer aroma and comforting glow.
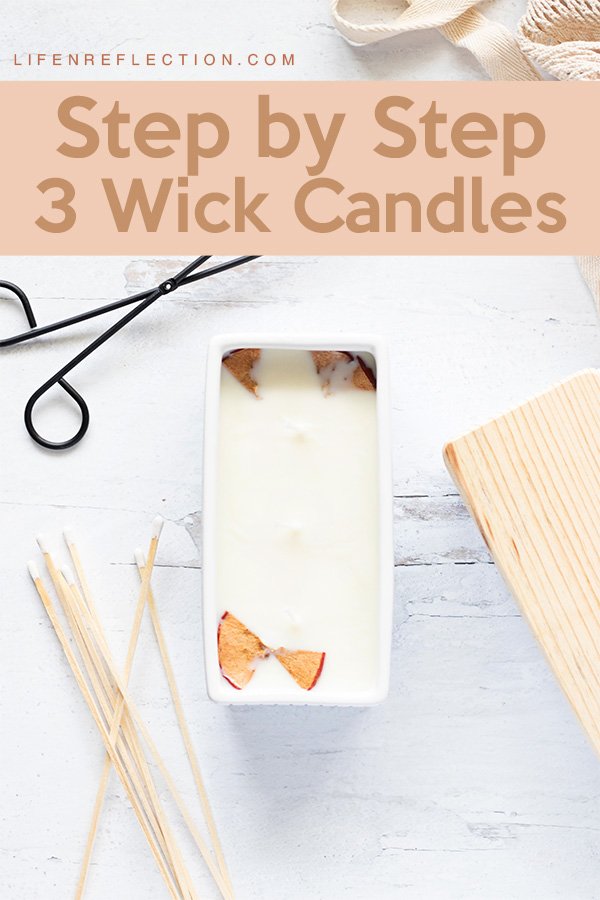
How to Make 3 Wick Candles
Candle Supplies:
2 rectangular 16-ounce candle containers
2 dried apple slices
6 clothespins
30 ounces soy wax flakes
½ ounce salted caramel fragrance
1 ounce apple cinnamon fragrance
Instructions for 3 Wick Candles:
1. Use wick sticker tabs to place each wick inside the candle containers. Evenly space wicks down the center length of the candle. Ideally, keep an even amount between each wick and the sides of the container.
2. Calculator the wax needed for your container here. Use a kitchen scale to measure your amount of soy wax to make 3 wick candles. (I needed 30 ounces of wax to fill both of my containers and leave room for a melt pool.)
3. Pour the wax into a candle melting pitcher to safely melt. Place the pitcher filled with wax inside a large saucepan filled with 2 inches of water. Using the double boiler method, heat on medium to low heat with a gentle simmer to reach the melting point of the candle wax. Stir often with a heat-resistant silicone whisk to speed up the process.
4. Remove from the heat immediately after melting. Then clip a candle thermometer inside of the pitcher or use an infrared thermometer for a contact-free, easy reading. Wait for the temperature of the wax to cool below the flashpoint of your fragrance. Use our candle fragrance calculator to determine the amount of fragrance you’ll need. (I added ½ ounce of salted caramel fragrance and 1 ounce of apple cinnamon fragrance.) Make sure to stir constantly for 1 to 2 minutes after adding fragrance to thoroughly incorporate.
5. Pour the scented wax into each container. Place a clothespin around each wick to keep them in place during the curing process. Leave each multi-wick candle to cool for 1 to 2 hours, then fix any sinkholes and smooth the tops as needed. To learn how to do that in our candle troubleshooting guide.
After, allow candles to cool for another hour before trimming wicks to approximately ¼ inch. Then give each 2 to 3 days to fully cure before lighting. 1 to 2 weeks is even better for a stronger candle scent.
Related To: DIY Wood Wick Candles
Related To: Candle Wax Type Guide
Print this tutorial on how to make 3 wick candles:
DIY 3 Wick Candles
If you’ve already mastered the basics of candle making, it’s time to take it an extra step and learn how to make 3 wick candles.
Materials
- 2 rectangular 16-ounce candle containers
- 6 cotton wicks
- 6 wick sticker tabs
- 2 dried apple slices
- 6 clothespins
- 30 ounces soy wax flakes
- ½ ounce salted caramel fragrance
- 1 ounce apple cinnamon fragrance
Tools
- kitchen scale
- candle melting pitcher
- heat resistant silicone whisk
- infrared thermometer
Instructions
- Use wick sticker tabs to place each wick inside the candle containers. Evenly space wicks down the center length of the candle. Ideally, keep an even amount between each wick and the sides of the container.
- Calculator the wax needed for your container here. Use a kitchen scale to measure your amount of soy wax to make 3 wick candles. (I needed 30 ounces of wax to fill both of my containers and leave room for a melt pool.)
- Pour the wax into a candle melting pitcher to safely melt. Place the pitcher filled with wax inside a large saucepan filled with 2 inches of water. Using the double boiler method, heat on medium to low heat with a gentle simmer to reach the melting point of the candle wax. Stir often with a heat-resistant silicone whisk to speed up the process.
- Remove from the heat immediately after melting. Then clip a candle thermometer inside of the pitcher or use an infrared thermometer for a contact-free, easy reading. Wait for the temperature of the wax to cool to below the flashpoint of your fragrance. Use our candle fragrance calculator to determine the amount of fragrance you’ll need. (I added ½ ounce of salted caramel fragrance and 1 ounce of apple cinnamon fragrance.) Make sure to stir constantly for 1 to 2 minutes after adding fragrance to thoroughly incorporate.
- Pour the scented wax into each container. Place a clothespin around each wick to keep them in place during the curing process. Leave each multi-wick candle to cool for 1 to 2 hours, then fix any sinkholes and smooth the tops as needed. To learn how to do that in our candle troubleshooting guide.
Notes
After allow candles to cool for another hour before trimming wicks to approximately, ¼ inch. Then give each 2 to 3 days to fully cure before lighting. 1 to 2 weeks is even better for a stronger candle scent.
Recommended Products
As an Amazon Associate and member of other affiliate programs, I earn from qualifying purchases.


What’s the best way to light a 3 wick candle?
Slightly turn each candle wick inward before burning to encourage an even burn. Then light each wick one after the other.
As each wick begins to burn, a small melt pool will form around individual wicks. Then as the melt pools grow they will expand to reach each other and the entire perimeter of the candle. Do not put out a multiple wick candle before a full melt pool occurs across the perimeter.
How long does a 3 wick candle last?
Multiple 3 wick candles will burn for approximately 30 to 45 hours. How long should you burn a 3 wick candle? 4 hours at a time is best. After each burn, allow the wax to cool and then trim the wicks to ¼ inch. This is a great candle care method that keeps the wicks from burning through the wax too fast – therefore extending the candle life.
YOU MAY ALSO LIKE:
- Flodesk Studio: First Look
- Wood Cutting Board Care
- Sun-Soaked Garden Beeswax Candles
- Lemon Cedar Dust Spray and Polish
- Lemon Poppy Seed Melt and Pour Soap Recipe

So, are you ready to create an incredible landscape of candlelight with a multi wick candle? Are you going to make a double or triple wick candle? Either way, you’ll instantly add atmosphere to any space with their gorgeous glow and strong scent.
Pin these easy techniques on how to make 3 wick candles now, and don’t forget to grab a printable candle wick size chart! Tag #lifenreflection on Instagram to share your candle making with us.