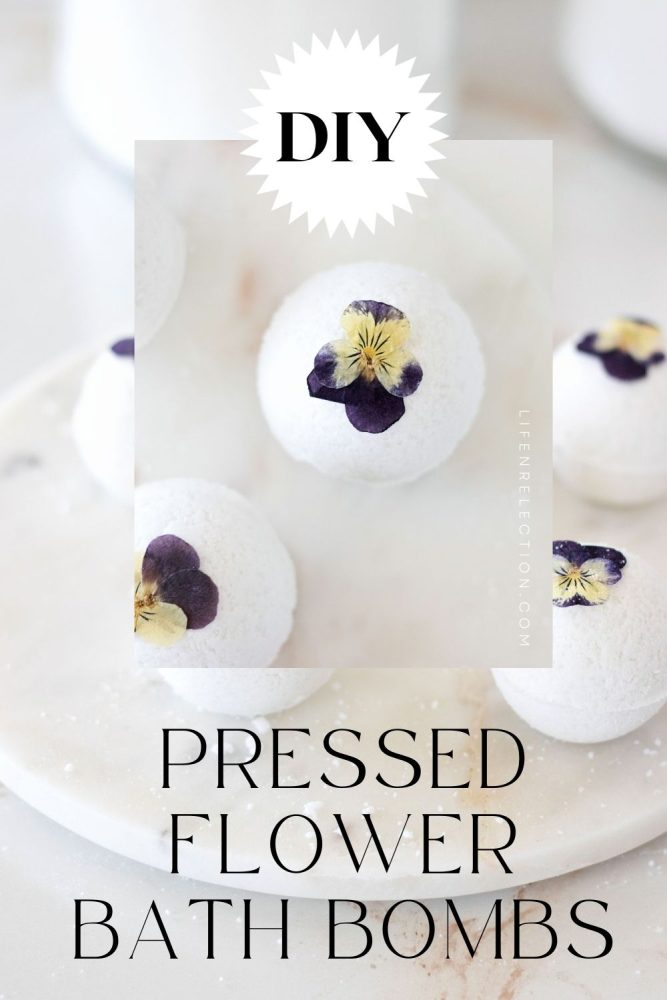
Bring The Garden To The Bathtub: Pressed Flower Bath Bombs DIY
A pressed flower bath bombs DIY to create a garden escape in your bath. Gain tips for flower pressing and bath bomb making with a full video tutorial!
As dawn’s light gradually spreads across the garden on a cool spring morning, dewdrops glisten and glow, illuminating each emerging bloom. Honey bees are busily buzzing from flower to flower, and the watch continues for the first butterflies to take flight.
These seasonal signals mean it’s time to capture spring blossoms. Especially those early spring flowers like pansies! I was so excited to try this pressed flower idea to savor their unique violet and blue colors in a floral bath bomb.
Pressing flowers gives them life longer after the spring season – and it’s quite easy!
I’ll show you four ways to press flowers and how to enjoy them in a fun floral bath soak with a homemade bath bomb recipe.
AS SEEN IN WILLOW AND SAGE MAGAZINE – You’ll love creating this pressed flower project from petal to fizz!
This post contains some affiliate links. Thank you for your support; read the full disclosure policy.
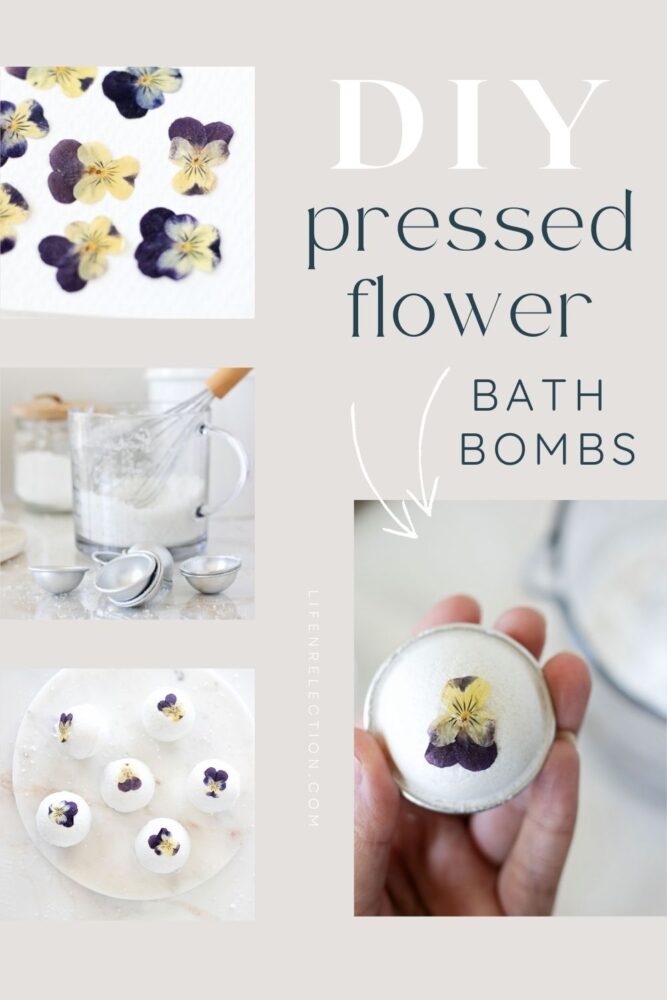
Four Ways to Press Flowers
Each bath bomb is like a little white canvas showcasing the colors and details of each pressed flower. Whether this is your first time pressing flowers or you’re keen to try a new method, here are four ways I press flowers.
Each works well, and one is not necessarily better than the other. In my experience, the big difference is the time or effort involved.
#1 Book Page Pressing
Tuck flowers in between the pages of a book or journal. Close the book, place something heavy on top, such as more books, and wait several weeks for the flowers to press flat. The biggest advantage of this method is that it’s free!
#2 Wooden Flower Press
The traditional method of flower pressing uses a wooden press. Place many layers of flowers between thin drying papers and sandwich them between the wood. (see this video to learn how) Like book page pressing, this method also takes several weeks.
#3 Iron Pressing
Place flowers between parchment paper and press firmly with a dry, hot iron for this flower-pressing technique. The results are fast, but it’s easy to burn your flowers and your hands in the process.
#4 Microwave Press
This flower pressing technique is fairly new, but it works really well. In my experience, flowers kept their color better. And it only takes minutes to zap them dry and flat in the microwave with a microwave press. See an incredible before and after at Farmhouse Chic.
related to
Showcase a memorable flower bouquet with this pressed flower craft idea!
If you’re in a rush, you can also buy pressed flowers. I found this pack of pressed violet pansies, also called Johnny Jump Up, flowers. They are the perfect size for bath bombs!
Creating Pressed Flower Bath Bombs
With your pressed flowers ready, gather these supplies to create bath bombs to soothe the skin, find stillness, and nurture your well-being this season.
This recipe makes 8 to 10 small bath bombs
Bath Bomb Ingredients & Supplies

How To Make Bath Bombs With Pressed Flowers With The Prettiest Pansy Petals
Watch me take each step in this video on YouTube to create these gorgeous bath bombs!
Step 1: Combine Dry Ingredients
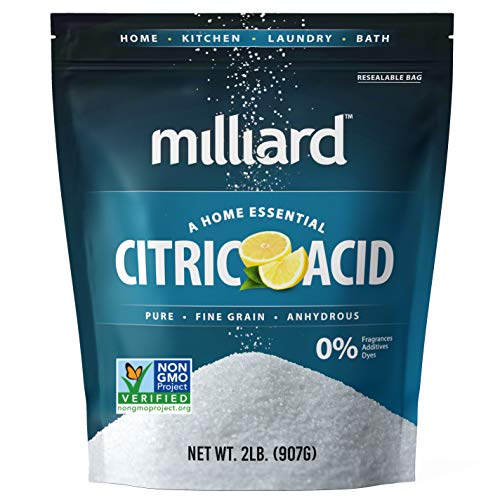
Sift 1 cup of baking soda, 2 tablespoons of Kaolin clay, and 1 cup of citric acid into a large glass mixing bowl. Whisk ingredients together to remove any remaining clumps after sifting.
Step 2: Prep and Combine Wet Ingredients
In a small glass beaker, combine 1 tablespoon of sweet almond oil with 20 to 25 drops of essential oil or ¼ tsp skin-safe fragrance oil and stir to combine.
I chose this natural skin-safe oil to evoke visions of a sun-dappled garden in full bloom. It’s a blend of geranium, jasmine, and ylang-ylang. That creates a floral harmony like no other. Use code CREATEWITHKRISTY10 to save 10% off your Makesy order.
Step 3: Combine Dry and Wet Ingredients
Slowly pour the wet mixture into the dry mixture, whisking as you go. Slow down if the mixture begins to fizz or foam. Add up to 10 mists of lavender witch hazel to reach the right consistency.
Test the Mixture: Scoop a small amount of the bath bomb mixture into your hand and squeeze it together to test the consistency. You want it to stick together and hold its shape.
If the mixture is too dry and powdery, add up to 2 teaspoons of water. Then mix well and test again. Repeat until you have the correct bath bomb consistency.
Step 4: Scoop Bath Bombs
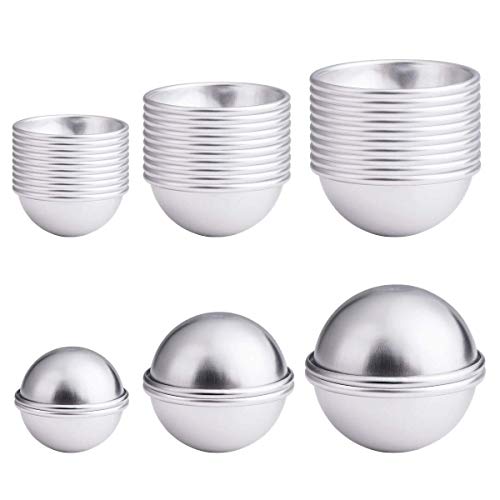
Once your bath bomb mixture is ready, apply a dab of sweet almond oil inside each bath bomb mold to help them release easily.
Generously scoop one-half of a bath bomb mold into the mixture. Then, place one pressed flower into the other half of the bath bomb mold and fill it until it’s overflowing. Press the halves together, twist, and let the bath bomb rest inside the mold for 2 minutes.
Keep going until you have filled all four bath bombs.
Step 5: Reveal and Dry
Gently release the bath bomb onto a cutting board or cookie sheet. If a bath bomb cracks while removing it, scoop more mixture into the molds and press them together again. Allow bath bombs to dry uncovered for 8 hours or overnight. Once dry, store in a container or a dry place until use.
Find this helpful?
Share it on Pinterest
And while you’re there, be sure to follow Life-n-Reflection for more inspiring ideas.

DIY Pressed Flower Bath Bombs
These DIY bath bombs are a beautiful way to bring the charm of the garden to your self-care routine or handmade gift ideas.
Materials
- 1 cup baking soda
- 2 tablespoons Kaolin clay
- 1 cup citric acid
- 1 tablespoon sweet almond oil
- Up to 2 teaspoons water
- 8 to 10 pansy pressed flowers
- 25 drops essential oil or ¼ tsp skin-safe oil
- 10 mists of lavender witch hazel
Tools
- 4 small stainless steel bath bombs molds
Instructions
- Sift 1 cup of baking soda, 2 tablespoons of Kaolin clay, and 1 cup of citric acid into a large glass mixing bowl. Whisk ingredients together to remove any remaining clumps after sifting.
- In a separate, small glass bowl, combine 1 tablespoon of sweet almond oil with 20 to 25 drops of essential oil or ¼ tsp skin-safe fragrance oil and stir to combine. Slowly pour the wet mixture into the dry mixture, whisking as you go. Slow down if the mixture begins to fizz or foam. Add up to 10 mists of lavender witch hazel to reach the right consistency.
- Test the Mixture: Scoop a small amount of the bath bomb mixture into your hand and squeeze it together to test the consistency. You want it to stick together and hold its shape.
Once your bath bomb mixture is ready, apply a dab of sweet almond oil inside each bath bomb mold to help them release easily. - Generously scoop one-half of a bath bomb mold into the mixture. Then, place one pressed flower into the other half of the bath bomb mold and fill it until it’s overflowing. Press the halves together, twist, and let the bath bomb rest inside the mold for 2 minutes. Keep going until you have filled all four bath bombs.
- Gently release the bath bomb onto a cutting board or cookie sheet. If a bath bomb cracks while removing it, scoop more mixture into the molds and press them together again. Allow bath bombs to dry uncovered for 8 hours or overnight. Once dry, store in a container or a dry place until use.
Notes
If the mixture is too dry and powdery, add up to 2 teaspoons of water. Then mix well and test again. Repeat until you have the correct bath bomb consistency.
Recommended Products
As an Amazon Associate and member of other affiliate programs, I earn from qualifying purchases.


Now you can follow my tips to press flowers with ease and enjoy a soothing soak in the bath with this pressed flower bath bombs DIY!
Why not share some of these bath bombs as DIY gifts? They’re like a flower bouquet wrapped in fizz!
Did you make this?
To share your creation on Instagram, mention @lifenreflection or tag #lifenreflection! What did you love most? Leave a comment below!