Wax Seal Stamping Tips and Tricks To Seal It With Success
Wax seal stamping tips and tricks to create wax seals like a pro! Video tutorial and more to save time, waste less supplies, and master wax seals.
Stationery has always been my thing—I’m that friend who’s spent hours crafting handmade cards and experimenting with paper crafts. This year, I went straight down the rabbit hole to making handmade paper with recycled materials and dried flowers. That got me itching for new stationery ideas.
Wax seal stamping had me instantly hooked! The slow pour, the colors, the candlelight, and the intricate stamping designs all had me head over heels.
But let’s be real: as much as I love it, creating a wax seal can be a bit of a hassle. It’s time-consuming and sometimes frustratingly inconsistent. That’s why I’m here to spill the beans on all the wax seal stamping tips I’ve picked up.
So you can nail it every time without frustration! No more trial and error, just straightforward advice to get the best results, waste less supplies, and save time!
For your convenience, this post contains some affiliate links; read the full disclosure policy.
What You Need To Know Before Wax Seal Stamping
Are your wax seals playing hard to get? I know how it feels to be disappointed when you’ve so carefully selected sealing wax colors, wax seal stamps, coordinating ribbons, and stationery, only to have a half-best seal.
If, despite all the effort, only half of your seals turn out as planned, then you need these wax seal stamping tips just as much as I did.
I know frustration is not only about wasting time; it’s about squandering your meticulously chosen supplies and crafting budget.
Whether you’ve been wielding a glue gun or a sealing spoon, I’ll teach you how to turn your wax seal game from hit-or-miss to pure perfection.
Related To: How To Make Wax Seals With Dried Flowers
Mastering Wax Seal Stamping Like a Pro With These Wax Seal Tips And Tricks
If you’re tired of your wax seals not turning out quite right or just starting and want to skip the frustration, you’re in the right place. It’s time you learned how to make wax seal stamps with ease!
Use The Correct Stamps
If you’re a fellow stationery addict, then you’re bound to have stamps. But here’s the thing – You need special stamps for wax seals! You cannot use standard rubber stamps to make wax seals. You’ll end up with a mess, an awful smell, and likely a ruined stamp.
Buy metal stamps made for wax seal stamping. Start with a wax seal stamping kit for a variety of options, or choose your favorites individually. I used the bundle of herbs in this wax seal stamp set to make the seals in the photos.
Game-Changing Tips For Faster Seals
1. Before you begin stamping, dip the metal end of the stamp into a tiny bowl of ice water. Allow it to chill in the ice bath, then blot it on a microfiber towel when your stamping wax is ready.
Repeat and place the stamp on a marble coaster to keep it chill between stamping. The cool metal will seal stamps faster, so you can make more wax seals in less time!
2. While I love the look and ambiance of candlelight from a wax seal stove, opt for a low-temperature mini glue gun designed for wax seal stamping if you need to quickly make dozens of wax seals.

Wax Seal Tips For Getting The Best Color
1. Unlike soap making or candle making, the color of the wax you start with will be the color of your seal. This is due to the fact that we are not mixing the colored wax with any.
So, because we’re not adding the colorful wax to white candle wax or a creamy white soap base, the colors are not diluted and remain the same.
2. Another tip for achieving the best color in your wax seals is to work with similar colors. If you only have one wax seal spoon or wax seal gun, work with like colors per crafting session.
Start by pairing wax seal colors by tone. You’ll have better results if you pair cool tones, such as green and blue, warm tones, such as rose, gold, or orange, or light tones, such as white and cream.
“Like colors” blend together for an appealing finish. By pairing colors, you’ll save a lot of time and wax versus switching from green to pink and needing to clean your wax spoon or clear your wax seal gun.
Related To: How To Color Candle Wax
Wax Seal Stamping Tip For The Perfect Seal
1. How do you stamp a perfect wax seal? If you want a consistent, full wax seal with a complete ring around it, use more wax than you think you’ll need!
Put more wax seal beads in the melting spoon and give them time to melt. In my experience, I need 2 to 3 wax seal beads to make 1 perfect wax seal.
It’s a good idea to test how much you need to pour from the spoon or squeeze from the wax seal gun to get a fully stamped seal. A few practice seals will help you achieve consistency and good-looking seals.
2. How long do you leave a stamp on a wax seal?
To create the perfect wax seal, leave the stamp on for 15 to 30 seconds to allow the wax to cool. Then, give the stamp a gentle pull. If the wax moves, let it cool longer. But if it feels stiff, wiggle the handle and pull the stamp off to reveal the seal!
Quick Wax Seal Tip To Hold Things In Place
If you’re working with ribbon, dried flowers, or other elements you want to seal in place with a decorative wax seal, follow this quick tip!
Place a small dot of melted wax with a wax seal stirring spoon, sealing wax spatula, or toothpick on the elements you want to hold in place. Wait for it to cool, then create your decorative wax seal on top to finish.
Tip For Sealing Envelopes
Use this tip if you attend to mail wax-sealed envelopes or have something small in an envelope you don’t want to fall out.
Before adding a wax seal, secure the envelope seal with a good bond tape. In my experience, licking the seal doesn’t always hold. And the wax seal is only for the bottom flap, so things could slide out if you don’t use bond tape first.

How Do You Stamp A Wax Seal?
Now that you know several wax seal stamping tips, you can start stamping! Follow these clear, step-by-step instructions to make wax seals.
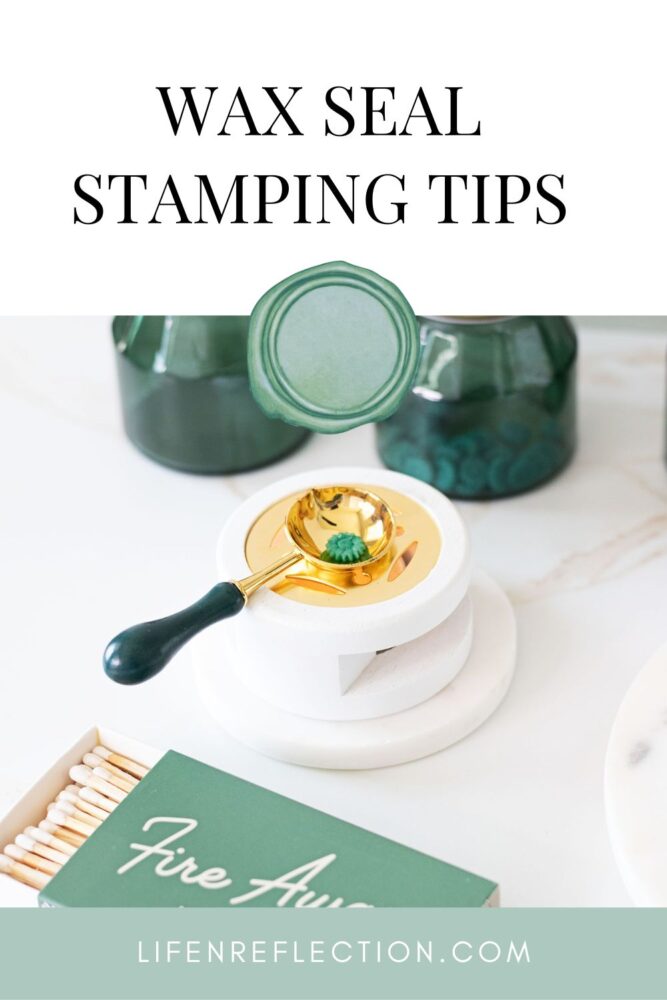
You’ll Need These Wax Seal Stamping Supplies:
- Wax Seal Stamps
- Wax Seal Stamp Handle
- Wax Seal Stove
- Tea Light Candle
- Wax Melting Spoon
- Green Wax Seal Beads
- Marble Coaster
- Ice Cubes
Step 1: Chill Your Wax Stamp
Screw your wax stamp into the stamp handle. Then, dip the metal end of the stamp into a tiny bowl of ice water. Allow it to chill in the ice bath, then blot it on a microfiber towel. Place the stamp on a marble coaster to keep it cold.
Step 2: Melt The Wax
While your stamp is chilling, begin melting the wax. Place a tea light candle (I make my own) inside a wax seal stove and light the wick. Place 2 to 3 green wax beads in the melting spoon for one wax seal.
Step 3: Pour The Wax And Stamp
Once the wax has melted, pour the wax onto the marble coaster or board in a circular pattern. (Don’t worry if it’s messy.) Stamp the seal into the center of the wax.
Step 4: Reveal The Seal
Wait 15 to 30 seconds for the wax to cool, then give the stamp a gentle pull. If the wax moves, let it cool longer. But if it feels stiff, wiggle the handle more and pull the stamp off to reveal the seal!

Wax Seal Stamping
Get hooked on wax seal stamps with a video tutorial and wax seal stamping tips and tricks for success!
Materials
- Tea Light Candle
- Green Wax Seal Beads
- Ice Cubes
Tools
- Wax Seal Stamps
- Wax Seal Stamp Handle
- Wax Seal Stove
- Wax Melting Spoon
- Marble Coaster
Instructions
- Screw your wax stamp into the stamp handle. Then, dip the metal end of the stamp into a tiny bowl of ice water. Allow it to chill in the ice bath, then blot it on a microfiber towel. Place the stamp on a marble coaster to keep it cold.
- While your stamp is chilling, begin melting the wax. Place a tea light candle (I make my own) inside a wax seal stove and light the wick. Place 2 to 3 green wax beads in the melting spoon for one wax seal.
- Once the wax has melted, pour the wax onto the marble coaster or board in a circular pattern. (Don’t worry if it’s messy.) Stamp the seal into the center of the wax.
- Wait 15 to 30 seconds for the wax to cool, then give the stamp a gentle pull. If the wax moves, let it cool longer. But if it feels stiff, wiggle the handle more and pull the stamp off to reveal the seal!
Notes
Follow these clear, step-by-step instructions to make wax seals.
Recommended Products
As an Amazon Associate and member of other affiliate programs, I earn from qualifying purchases.


Did you make this?
To share your creation on Instagram, mention @lifenreflection or tag #lifenreflection! What did you love most? Leave a comment below!
YOU MAY ALSO LIKE:
- Flodesk Studio: First Look
- Wood Cutting Board Care
- Sun-Soaked Garden Beeswax Candles
- Lemon Cedar Dust Spray and Polish
- Lemon Poppy Seed Melt and Pour Soap Recipe
Now, you can transform your wax seal game with these wax seal stamping tips and tricks! From choosing the right tools to troubleshooting imperfections, this guide is a must-pin for all wax seal enthusiasts.
Find this helpful?
Share it on Pinterest
And while you’re there, be sure to follow Life-n-Reflection for more inspiring ideas.
Thanks!
I was playing with my kit today (kid’s Valentine’s cards) and couldn’t get it right.
Ice bath… That makes sense!
Makes all the difference right – those are going to be the prettiest Valentine’s!!