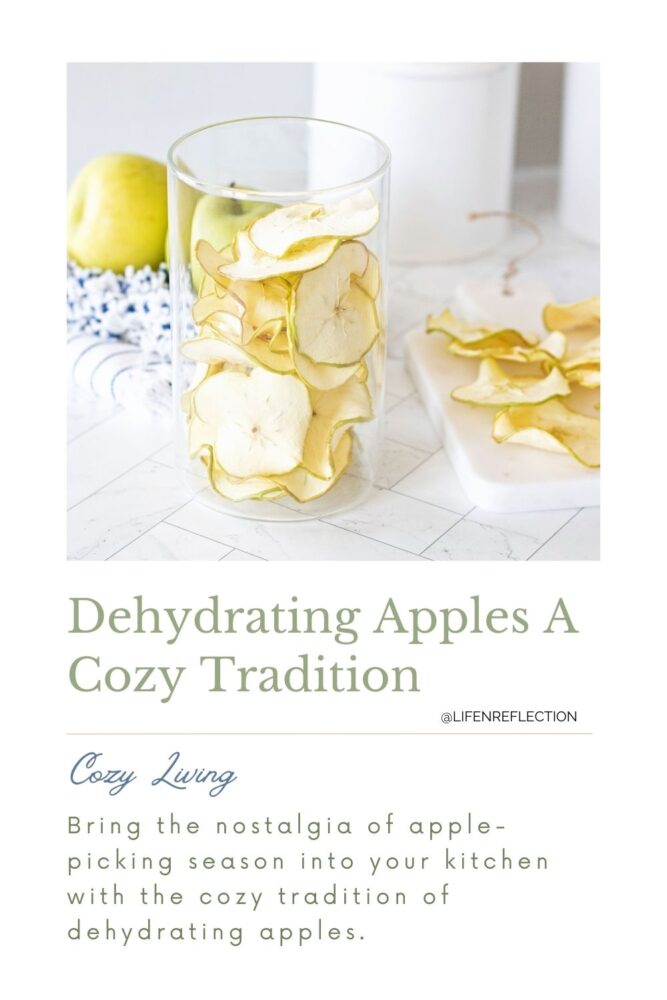
Dehydrating Apples: A Cozy, Festive Tradition For Treats, Crafts, and Decor
Dehydrating apples in a dehydrator for cozy, festive traditions, treats, crafts, and decor. Tips and full video for how to dehydrate apples!
Even though I was born in December, I’m an Autumn, through and through. Wearing my favorite overalls, sipping apple cider, pressing fall leaves, baking with clove and nutmeg, and burning through my stash of fall candles. It’s my favorite season of the year!
Growing up, our family farm sat just a few short miles away from an apple orchard. When apple-picking season began, we made the best of it! Arriving early in the morning to pick apples brushed with dew. Glistening inside the tangly tree branches, they begged to be wiggled free!
It never took long to gather a bushel and reward ourselves with a steaming cup of apple cider inside the orchard’s barn. If you’re lucky enough to live near an orchard, go and experience apple picking firsthand.
When you return home, don’t just bake apple treats – capture the essence of the occasion by dehydrating apples. It’s a tradition I’ve kept to evoke the nostalgia of the season.
You can learn this cozy, festive tradition, too, with tips for selecting apples, prepping, and preserving apples without turning brown. Plus, I have a full video tutorial to share with you!
This post contains some affiliate links. Thank you for your support. Please read the full disclosure policy for more details.
What Is The Best Kind Of Apple To Dehydrate?
A member of the rose family, along with almonds, strawberries, pears, peaches, and cherries, apples come in many varieties. While the apple itself didn’t originate in America, John Chapman, better known as “Johnny Appleseed”, was an American pioneer who became a legend after establishing apple orchards throughout much of the American Midwest.
Over the years, American apple varieties have become well-known and are exported around the world. With so many options, it’s fair to ask what apples are best for drying?
- If you’re drying apples for a sweet treat, opt for Gala, Fuji, or HoneyCrisp. They’ll taste like you added sugar, even when you haven’t.
- For crisp dehydrated apple slices, choose tart apples, such as Granny Smith and Macintosh. They are lower in sugar, have a sharp flavor, and hold their shape well.
- If you’re creating a dried apple wreath or garland, consider drying both red and green apples for a vibrant color mix. I chose Granny Smith apples this year, and that’s what you see in the photos.
You May Also Like
Create dried citrus candles with lemon, lime, and orange slices!

5 Tips To Dehydrate Apples With Success
You’ll love filling your home with the sweet aroma of drying apples and, better yet, enjoying each slice after. To dehydrate apples in a dehydrator with success, read these five tips first.
1. Should apples be peeled before dehydrating?
Apples can be dehydrated, peeled or unpeeled. I think the peel adds a nice pop of color to apple slices. Plus, keeping the skins intact preserves that beautiful, rustic texture and all the simple, natural goodness of a fresh-picked orchard apple!
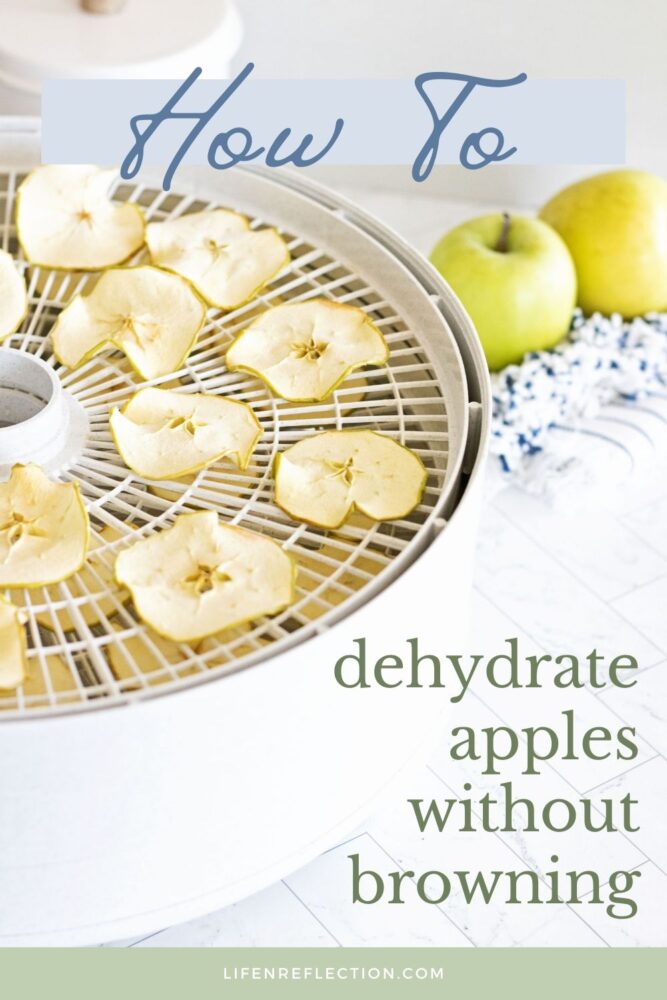
2. How do you dehydrate apples so they don’t brown?
When apples are sliced and exposed to air, the oxidation process begins. The structure of the apple softens and naturally turns brown. However, we can prevent apple slices from turning brown with a simple pre-treatment.
Preparing a mixture of fresh lemon juice and citric acid to soak apple slices in before dehydrating will prevent discoloration and help preserve the fruit. (I’ll show you how with an easy recipe below.)
Do you have to use lemon juice to dehydrate apples? No, you can skip it. But your slices will most likely brown while drying.
3. How long does it take to dehydrate apples?
The length of time needed to dehydrate apples will vary based on a few things. One being the temperature used, air flow, size, and the amount of moisture.
I highly recommend using a mandoline for thin, uniform slices, because when each slice is the same thickness, they dry more evenly. With a mandoline slicer, you can easily achieve ⅛ inch and ¼ inch slices that dry much quicker. It’s also best to pat dry slices before dehydrating to cut the level of moisture.
4. How do I know when my dehydrated apples are done?
Apples are dehydrated when they are no longer sticky, feel leathery, and snap when bent. (I share an easy process in the steps below to ensure each slice is dry.)
5. How do you store apples after dehydrating?
After cooling and conditioning, store apples in an airtight container, preferably a glass container, away from direct sunlight. An ideal place is your kitchen pantry.
During the first week after dehydrating, shake the apple slices daily and check for buildup of condensation. If it occurs, run the apple slices through the dehydrator again. When no condensation appears in a week, they can be stored for one year.
With these tips, you’re ready to get started!
Find this helpful?
Share it on Pinterest
And while you’re there, be sure to follow Life-n-Reflection for more inspiring ideas.
How To Dehydrate Apples In A Food Dehydrator
Enjoy the festive tradition of dehydrating apples alongside me in the kitchen. Pick your apples from the best kind of apples to dehydrate I shared above, then gather your supplies and get ready to learn how to dehydrate apples!
OH, and don’t miss the fun list of ideas to use dehydrated apple slices!!
You’ll Need:

If you’d like to see the process step by step, I filmed it all in my kitchen—you can watch the full tutorial on YouTube. So, pour yourself a mug of cider, press play, and join me in celebrating this cozy fall ritual!
Instructions
- Gently wash and pat dry apples with a clean towel.
- Roll lemons on a cutting board. Then, squeeze the juice from two lemons into a large bowl with a handheld lemon squeezer. Add 1 teaspoon of citric acid and stir it into the lemon juice. Set aside.
- With the aid of a mandoline slicer, cut apple rings from one apple into ⅛ or ¼ inch slices. Remove the seeds as you go and discard them.
- Immediately add apple slices to the pretreatment. Soak slices for 5 to 10 minutes. Then lay slices on a flat, clean towel and pat dry.
- After, place apple slices on a dehydrator tray in a single layer, spaced apart. Do not stack or overlap; fill as many trays as needed. (Did you know you can get a stack of additional trays?) Repeat with the next apple until you have filled each tray.
- Start the dehydrator at 145°F and run for one hour. Then bring the dehydrator down to 135°F and process until dry. The total drying time will vary, but be prepared for 6 to 12 hours of dehydrating. (My thin slices took six hours to dry.)
- When you think the apples are dry, turn off the dehydrator and separate the trays. Let the apples cool on the trays for 30 minutes. Then place the slices into an airtight container (this what I use). If they feel leathery and snap when bent, they’re dry!
- Continue to condition slices by shaking the apple slices daily and checking for buildup of condensation. If it occurs, run the apple slices through the dehydrator again. When no condensation appears in a week’s time, they can be stored for one year.
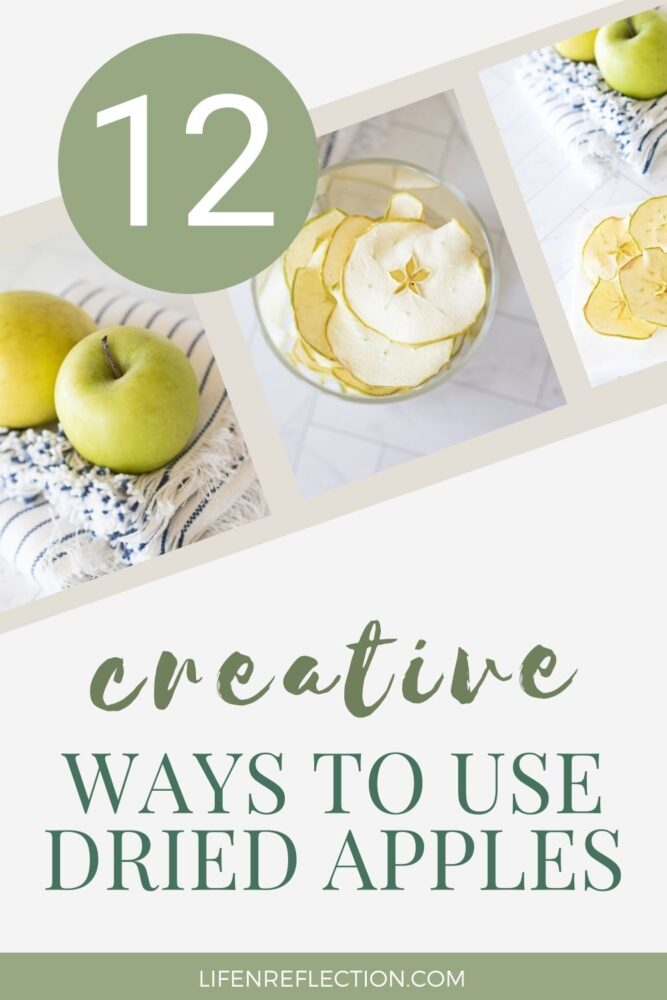
A Dozen Ways To Use Dehydrated Apples
You can instantly make your home feel like fall with the cozy nostalgia of dehydrated apple slices with these ideas for use:
There’s nothing quite like the simple joy of preserving apples to carry the season’s warmth into every corner of your home. From snacks and simmer pots to festive décor, dehydrated apples are as versatile as they are nostalgic.
Did you make this?
To share your creation on Instagram, mention @lifenreflection or tag #lifenreflection! What did you love most? Leave a comment below!
In case you missed it – I filmed each step in my kitchen—you can watch the full tutorial on YouTube!