Milk and Honey Scented Beeswax Candles DIY
These milk and honey scented beeswax candles DIY are as sweet as can be. Poured into honeycomb ceramic bowls, they’re a beekeeper’s dream!
I think this is a safe place to admit; I have an obsession with honey. It smells just as sweet as it tastes. What more could you ask for?
I regularly apply it in the shower with a homemade honey body scrub. And I soak in its lusciousness in the bathtub with almond honey bath melts. I stir raw honey into my hot tea. And I even slather it on my face creating a DIY honey face mask for an instant glow.
I understand entirely why honey has long been referred to as liquid gold. The scent alone reminds me of all the ways honey soothes and nourishes me. But, if there’s anything better than the scent of honey, it’s the dreamy combination of milk and honey.
So why not make milk and honey scented candles? This duo will please just about everyone. Learn how to get a dreamy milk and honey scent and gather beeswax candle-making tips along the way with this beeswax candle DIY!
For your convenience, this post contains some affiliate links; read the full disclosure policy.

How Do You Make Beeswax Candles At Home?
I’ve been making candles for years, and therefore I’ve tried every candle wax type. Soy, coconut, and beeswax are my favorites to work with. I love the fact they’re all-natural, and so my candles always have a clean burn.
But, I have to tell you, when it comes to finding pure beeswax, it can be difficult. I’ve opened my fair share of beeswax boxes and bags that smelled awful. The beeswax should always smell sweet, not stinky. And unless you’re buying white beeswax, it should be a golden-yellow color.
I recently came across Sperry Beeswax. They’re a family of beekeepers who make pure beeswax blocks straight from the hive. They filter and clean the beeswax, then melt it and pour it into the mold, all on the same farm.
And it shows because their beeswax is amazing! It smells as sweet as honey. You can use it to make candles, lip balms, beeswax wraps, and so much more.
Oh, and I love that they offer free shipping on every order because that can get pricey when you’re shipping pounds of wax!
Related To: 20 Things You Can Make With Beeswax
Can you make candles with just beeswax?
Yes, absolutely, you can make candles with just beeswax. I made these terracotta candles with pure beeswax.
However, beeswax doesn’t hold fragrance as well as other candle waxes. So if you want to make scented beeswax candles, I find you’ll get a stronger scent when you blend either coconut oil, coconut wax, or soy wax with it.
For this scented beeswax candle tutorial, I chose soy wax flakes. If you want to use coconut oil, take a look at this tutorial.

How Do You Add Scent To Beeswax Candles?
Essential oils are a great way to go when it comes to adding scent to beeswax candles. But, for these candles, I wanted to capture that gorgeous milk and honey scent you can’t find in essential oils.
So for this candle DIY, I chose a certified natural manuka milk & bergamot honey fragrance from Makesy (save 10% off with my code CREATEWITHKRISTY10). It’s a beautiful blend that begins with heartwarming honey melded with a zest of orange and bergamot, a splash of almond milk, and sweet vanilla. It is a silky, warm honey scent that’s instantly uplifting.
How much candle scent do you need?
For this recipe, I used my fragrance load calculator to calculate a 7.17% fragrance load to make four 8-ounce candles by using 2.50 ounces of fragrance for a great scent throw.
And as I mentioned, adding a scent to pure beeswax will give you a light and airy scent. If you prefer a stronger candle scent that will fill a space, I definitely recommend using it in a blend of wax.
Find your favorite candle scents with our fun candle scent quiz!
Related To: How To Make Beeswax Tea Light Candles
Making Milk and Honey Beeswax Candles
I can assure you this milk and honey scented beeswax candle DIY is as sweet as can be. Poured into honeycomb ceramic bowls, they’re a beekeeper’s dream!
If this is your first time making candles, you may want to check out our candle resource center, read my step-by-step Creative Candles Made Simple book, or start with a beginner’s guide to candle making.
Scented Beeswax Candle Supplies:
4 honeycomb design 8-ounce ramekins
1.20 lbs soy wax
1 lb beeswax block
2.50 ounces milk and honey fragrance
How To Make Scented Beeswax Candles:
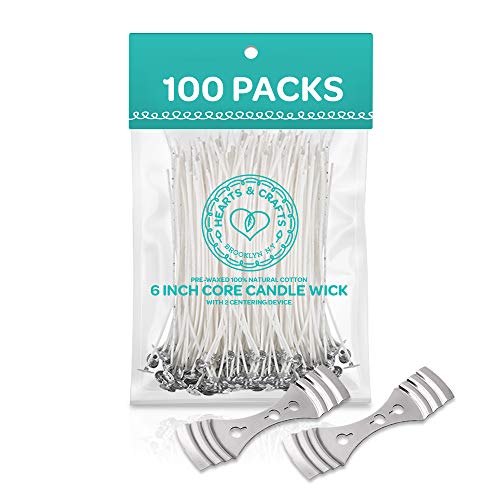
1. Press a cotton wick into a wick tab. Then place it into the center base of one honeycomb ramekin (this is the closest design I could find, note that they are a smaller size). Repeat until you have prepared four candles.
2. Use a kitchen scale to measure 1.20 lbs of soy wax and 1 lb of beeswax. If you’re working with a block of beeswax, it’s best to grate it or slice it into chunks before placing it in a candle-melting pitcher.
Place the wax-filled pitcher inside a saucepan that is filled with about 2 inches of water. Using the double boiler method, heat on low heat with a gentle simmer at most. Stir slowly, yet often, and do not heat the wax above 170°F.
3. Remove the pitcher from the heat immediately after melting. Check the temperature of the wax with a quick infrared thermometer. You’ll want to wax to cool to 165°F before adding 2.50 ounces of the milk and honey fragrance.
Slowly stir the fragrance into the wax for a consistent two minutes.
4. The best temperature to pour this blend is 150°F. The wax will still be liquid but cool enough to coat the sides of your pouring pitcher. Carefully pour the scented wax into each prepared honeycomb ramekin. I find that it is helpful to line your work area with a used brown paper bag, old newspaper, or parchment paper to catch any drips or overpours.
5. Slip a wooden candle-centering device over the wicks to keep them in place while curing. Remove after 24 hours and trim the candle wicks to ¼”. Wait three to seven days before lighting a candle for a strong scent.
Tips To Clean Up Beeswax
Cleaning up beeswax can be pretty challenging. Use these tips to make it easy:
After pouring your candles, place your candle pitcher back in the double boiler and allow the wax to melt a bit more. (There’s no need to turn the heat back on; the water’s heat should be warm enough to do the job).
Once the wax is melted again, remove it from the double boiler and wipe the excess wax away with an old cloth or paper towel.
Print This Candle DIY

Milk and Honey Scented Beeswax Candles
These milk and honey scented beeswax candles DIY are as sweet as can be. Poured into honeycomb ceramic bowls, they’re a beekeeper's dream!
Materials
- 4 honeycomb design 8-ounce ramekins
- 1.20 lbs soy wax
- 1 lb beeswax block
- 4 cotton wicks
- 4 wick tabs
- 2.50 ounces milk and honey fragrance
Instructions
- Press a cotton wick into a wick tab. Then place it into the center base of one honeycomb ramekin (this is the closest design I could find, note that they are a smaller size). Repeat until you have prepared four candles.
- Use a kitchen scale to measure 1.20 lbs of soy wax and 1 lb of beeswax. If you’re working with a block of beeswax, it’s best to grate it or slice it into chunks before placing it in a candle-melting pitcher. Place the wax-filled pitcher inside a saucepan that is filled with about 2 inches of water. Using the double boiler method, heat on low heat with a gentle simmer at most. Stir slowly, yet often and do not heat the wax above 170°F.
- Remove the pitcher from the heat immediately after melting. Check the temperature of the wax with a quick infrared thermometer. You’ll want to wax to cool to 165°F before adding 2.50 ounces of the milk and honey fragrance. Slowly stir the fragrance into the wax for a consistent two minutes.
- The best temperature to pour this blend is 150°F. The wax will still be liquid but cool enough to coat the sides of your pouring pitcher. Carefully pour the scented wax into each prepared honeycomb ramekin. I find that it is helpful to line your work area with a used brown paper bag, old newspaper, or parchment paper to catch any drips or overpours.
- Slip a wooden candle-centering device over the wicks to keep them in place while curing. Remove after 24 hours and trim the candle wicks to ¼”. Wait three to seven days before lighting a candle for a strong scent.
Notes
After pouring your candles, place your candle pitcher back in the double boiler and allow the wax to melt a bit more. (There’s no need to turn the heat back on; the water’s heat should be warm enough to do the job).
Once the wax is melted again, remove it from the double boiler and wipe the excess wax away with an old cloth or paper towel.
Recommended Products
As an Amazon Associate and member of other affiliate programs, I earn from qualifying purchases.


Light a candle and enjoy the melody of beeswax, rich manuka honey, almond milk, zesty orange, bright bergamot, and sweet vanilla in this beekeeper’s dream of a candle.
Place one in the kitchen or guest bath, or give a honey candle to a friend who shares a love for honey bees. I know they’re sure to please.
YOU MAY ALSO LIKE THE FOLLOWING:
- Wood Cutting Board Care
- Sun-Soaked Garden Beeswax Candles
- Lemon Cedar Dust Spray and Polish
- Lemon Poppy Seed Melt and Pour Soap Recipe
- DIY Gardeners Hand Scrub Recipe
Save this milk and honey beeswax candle DIY to your DIY candle Pinterest board, and while you’re there, be sure to follow Life-n-Reflection for more inspiring ideas.
Did you know you can Tag #lifenreflection on Instagram to share yours with me?